DSC_0006-1

Easter Rocky Road

One more quick Easter recipe for you. Yes, it’s basically just Rocky Road – but the Easter version. So it’s automatically even greater. And it takes ten minutes to put together. And very little skill. And I’m tired, okay, so unfortunately for you, this lazy recipe is all you get today. The Hot Cross Cookies were a slightly more respectable attempt at Easter baking.

DSC_0024-670x1024

I barely ever make Rocky Road actually, because a) James loves it, and b) I am lukewarm about it. This makes me sound very selfish, but truly, James doesn’t really want me to make it often because it means I’ll come home one day and find him sitting on the floor in the kitchen with chocolate all over his face, an empty tin clutched in his sticky fingers, and a wild look in his eyes. I’m being cruel to be kind.

DSC_0034-683x1024

I don’t quite know what’s so joyful about Easter eggs, but they’re magical. Even if it’s completely standard chocolate that you wouldn’t normally look twice at, somehow having it in an egg shape makes it incredibly appealing. This follows through to mini eggs too. I don’t know why, but I find them totally irresistible. So, even though I am lukewarm about Rocky Road, I ate quite a lot of this batch.

DSC_0055-1-1024x683

Notes

I’m not going to pretend this is a particularly inventive or difficult thing to make. It’s just normal rocky road plus Easter eggs. You can substitute anything else when we’re not in Easter season.

Ingredients

125g butter
300g chocolate – dark, milk, or a mixture depending on your taste
3 tbsp golden syrup
200g oat biscuits (or whatever biscuits you like)
100g marshmallows (cut them in half if they’re big ones)
150g mini eggs
2 tbsp icing sugar (for dusting)

Method

  1. Line a 20cm square tin with baking paper and make sure you have space to fit it in your fridge.
  2. Put your butter, chocolate, and golden syrup in a large saucepan and melt over a medium heat. While everything is melting, put your biscuits in a freezer bag and bash them with a rolling pin to break them up a bit, leaving some chunky pieces. When the chocolate mix is melted, stir the biscuits and marshmallows into it.
  3. Reserve a handful of your mini eggs, then roughly chop the rest and mix them into the chocolate. Spread the mixture out evenly in your lined tin and flatten the top. Push your reserved mini eggs into the surface of the rocky road, then pop the whole thing in the fridge to set for a couple of hours.
  4. When it’s set, dust the top with icing sugar, cut it into squares, and serve.
DSC_0018-1

Hot Cross Cookies

Let’s get the obvious thing out of the way first. I suck at piping white chocolate. Try to ignore how messy these look, and appreciate that hot cross cookies are an excellent addition to the Easter baking roster. I am a big fan of Easter brownies, and generally go for the ‘add creme eggs and mini eggs and it’s a done deal’ school of Easter baking.

DSC_0001-1024x683

But sometimes, you’ve got to mix it up. I love hot cross buns passionately, but there’s no denying they’re a bit of a faff to make. They’re not stupidly difficult or anything, but as with most breads you have to wait for things to rise and prove and so on. And sometimes (okay, often) I am just too impatient for such things. Enter: hot cross cookies.

DSC_0027-1024x683

Notes

This recipe makes around 20 generously sized cookies.

If, like me, you live in a two person household, and don’t want to bake 20 cookies at once because you know you will just eat them all, I have a solution for you. Freeze all the cookie dough (i.e. get up to the end of step 2 in the recipe), then bake the cookies off in batches of two or four or whatever is manageable for the next few weeks. You will have delicious freshly-baked cookies in fifteen minutes in small batches.

Ingredients

250g butter, softened
200g light brown sugar
100g caster sugar
3 large egg yolks
325g plain flour
1 tsp fine sea salt
1 tsp bicarbonate of soda
2 tsp cinnamon
1 tsp allspice
100g mixed peel (should come diced but chop it finely if not)
100g raisins or sultanas
75g white chocolate

Method

  1. Line a baking tray which will fit in your freezer with parchment paper. In your largest bowl or in a stand-mixer, beat the butter and both types of sugar together until just combined and even, then beat in the egg yolks – all at once is fine. Add your flour, salt, bicarbonate, cinnamon, and allspice. Mix to form firm dough. Finally, fold in your mixed peel and sultanas.
  2. Using a small ice cream scoop (or spoons, or your hands…) scoop the dough into golf ball sized rounds and pop them on your lined tray. Freeze for an hour, or up to a month.
  3. Heat your oven to 180C/ 160C fan/ gas 4, and take the cookies out of the freezer. Spread the frozen dough between three or four lined baking trays – you need to give them a lot of space to expand.  Bake for 15-20 minutes, until the outsides of the cookies are baked and crispy, but the insides still feel soft and underbaked. Let them rest on the counter to firm up for at least 10 minutes. Remove to wire racks to cool completely before piping on your chocolate.
  4. Melt your white chocolate however you see fit (in a bowl over a pan of simmering water is safest, but I often just microwave on medium power in short bursts for such small amounts). Pop it in a piping bag (or a sandwich bag), snip off the end, and pipe crosses onto your cool cookies. Alternatively, skip the cross thing and just drizzle them recklessly with chocolate. Less Easter-themed, but slightly easier.
DSC_0058

Cherry, Coconut, and Almond Cake

As you may have noticed, I am all for huge decadent cakes covered in stuff. But sometimes, even I am looking for something a bit more low-key. The sort of thing that you can knock up in a spare half hour. The sort of thing that doesn’t involve stacking layers, or making any buttercream. This cherry, coconut, and almond cake is not at all needy or precious. It’s a very ‘throw it together’ sort of cake. It’s low-maintenance. Robust. And it’s delicious.

DSC_0010-1-683x1024

Something about the combination of coconut and the almond in this cake results in a beautifully moist and tender crumb. Studding it with fruit just makes it even more delicious. It’s a crowd-pleaser, and it will stay that way for a few days, kept at room temperature in an airtight container. It really does do a lot of heavy lifting, considering how easy it is to put together.

DSC_0048-1024x683

There’s also something comfortingly spring-like about this cake, even though it uses store cupboard ingredients. It’s a gentle hug of a cake, but its nutty fruitiness makes it light and promises of warmer days to come. You could imagine serving a cherry, coconut, and almond cake at Easter. Then again, as I write this it’s snowing heavily outside onto an already thick carpet of the stuff, so perhaps spring will never come anyway.

DSC_0042-683x1024

Notes

You can put whatever fruit you like in this, almost. I love it with cherries but it would also work well with strawberries, blueberries, blackberries…

I’ve suggested using canned or frozen cherries here, because they are stoned. I don’t have the patience for stoning cherries. And it’s not cherry season. But you do you.

Source

Adapted from the delicious blueberry cake in the excellent Sweet by Yotam Ottolenghi and Helen Goh.

Ingredients

200g butter, melted
180g ground almonds
70g dessicated coconut
250g caster sugar
80g self-raising flour
½ tsp salt
4 eggs
2 tsp vanilla extract
200g frozen or tinned cherries
30g flaked almonds

  1. Pop the butter on to melt. When it’s melted, set it aside to come to room temperature. Quarter your cherries. Grease and line a 23cm springform cake tin. Preheat oven to 180C/160C fan/ gas 4.
  2. Put your ground almonds, coconut, caster sugar, flour, and salt in a large mixing bowl and give them a quick stir to make it even. Beat your eggs together lightly in a measuring jug, then whisk in your melted butter and vanilla. Gradually pour this into the dry mix, beating all the while, until evenly combined. Fold in three quarters of the cherries and pour the mixture into your cake tin – you will have a very loose batter.
  3. Sprinkle the reserved cherries on top, followed by the flaked almonds. Bake for 45-55 minutes, or until risen, golden, and passing the skewer test. Let it sit for at least 20 minutes before trying to get it out of the tin.
DSC_0004-1

Mocha Cupcakes

So, let me level with you. The reason these mocha cupcakes exist is because I fairly recently got a kitchen blowtorch and since then I have wanted to blowtorch everything. I got the idea of topping cupcakes with an Italian meringue and finishing them off with the blowtorch and got a bit obsessed with it. You might, rather reasonably, be thinking ‘well, I don’t have a blowtorch so this recipe is of no use to me’. I hear you. I get that most people do not have a blowtorch. But the Italian meringue topping these cupcakes is still perfectly delicious un-blowtorched.

DSC_0023-683x1024

When you make Italian meringue, the hot sugar syrup you incorporate into the egg whites cooks the egg, so going over it with a blowtorch is for effect and a bit of toasty flavour rather than cooking. And if you cannot really be bothered with the whole meringue deal anyway, you can simply top these delicious chocolate cupcakes with buttercream. Or leave them plain and shove them, unadorned, directly into your mouth. It’s all good.

But, should you wish to go down my mocha cupcake route, then do read on to the recipe below.

DSC_0028-1024x683

Notes

The recipe makes around 18-20 cupcakes.

The coffee in these cupcakes is mostly to boost and enhance the chocolate flavour, but it’s not really dominant. This is because I do not drink coffee. But if coffee is your jam, do feel free to up it here by raising the quantities of espresso powder, adding coffee extract, or brushing the finished cupcakes with a coffee syrup.

If you are making the meringue, you will need a sugar thermometer and some sort of electric whisk – hand held or a stand mixer will do it.

Ingredients

for the cupcakes

170g butter
170ml very strong black coffee
3 tsp espresso powder
40g cocoa powder
85g dark chocolate, finely chopped
225g light brown soft sugar
2 tsp vanilla
½ tsp salt
3 eggs, plus 1 extra yolk
130g plain flour
1.5 tsp bicarbonate of soda

for the meringue topping

50g of egg white
100g of white granulated sugar
25ml of water
2 tsp espresso powder

Method

  1. Heat your oven to 190C/170C fan/gas 5. Line two muffin tins with around 20 paper cases (if you only have one tin, just bake in two batches). Put your butter and coffee in a large pan over a low heat to melt the butter, then add the espresso powder and stir to dissolve. Whisk in your cocoa and chopped dark chocolate until the chocolate is melted. Add your sugar, vanilla, and salt, and mix again. Mix in your eggs and extra yolk. Finally, sieve your flour and bicarb over the pan and fold that in too. You should have a very runny cake mix.
  2. Fill your paper cases two thirds full (I use an ice cream scoop). Bake them for 15 minutes, or until your cakes are risen and fairly firm.
  3. While your cakes are baking, make your meringue. Beat your egg whites with an electric whisk or in a stand mixer until they form stiff peaks. Put your sugar, water, and espresso powder in a pan and heat gently, stirring a little, to dissolve the sugar. When the sugar is dissolved, whack the heat up and let it bubble away until it hits 120C on a sugar thermometer. Then pour the syrup into the stiff egg whites in a thin stream, beating all the while on high speed. When it’s all in you should have thick, glossy meringue. Keep whisking it for around five minutes, until the bowl is cool to the touch.
  4. When your cupcakes are baked, top them as you wish. If you’ve made the meringue, you can either spoon or pipe it onto the cakes, and you can blowtorch them or leave it at that. You could also top the cupcakes with buttercream or leave them plain.
DSC_0003

Orange and Rhubarb Cheesecake

Here is an antidote to the grey days, the rainy days, the days when Spring is a misty, half-forgotten memory and you can’t remember the last time you went out without a coat. Yes, the cold snap is dragging on a bit, but that’s all the more reason to make yourself a sunshine-y treat, even if you’re doing it with winter ingredients. Rhubarb and oranges are both plentiful right now, and they’re an ideal match in this creamy cheesecake. The vibrant pinks and oranges will cheer up any gloomy day, and this crowd-pleasing dessert is sure to put a smile on your face.

DSC_0016-1024x675

There’s something completely addictive about this cheesecake. James and I ate half of it between the two of us on day one, and gave the rest away very reluctantly as a self-preservation measure. There’s a luxurious creaminess to it, but also the bright and refreshing lightness of fruit. A worryingly delicious combination.

It’s also very simple to make. My inherently laziness has always resulted in my plumping for set cheesecakes rather than baked cheesecakes as a general rule (except that one time I went mad). Even though both are delicious, the set variety are undeniably easier.

DSC_0021-1-683x1024

Ingredients

400g rhubarb
2 tbsp caster sugar
250g ginger biscuits (or biscuits of your choice – digestives and oat biscuits also work well)
100g butter, melted
600g full-fat cream cheese
zest of 3 oranges – use the segments for the decoration
125g icing sugar
150ml double cream

Method

  1. Heat your oven to 220C/ 200C fan/ gas 5. Trim your rhubarb, and cut it into roughly 3cm chunks. Toss the rhubarb in the 2 tbsp caster sugar. Roast for 10-15 minutes, or until the rhubarb is soft but not collapsing. I then ran over it with a blowtorch for extra char, but that’s obviously totally not necessary – I realise most people don’t have a kitchen blowtorch! Leave it to cool.
  2. Line a 23cm springform tin. Gently melt your butter, if you haven’t already. Blitz your biscuits to rubble in a food processor, or pop them in a bag and bash them for some stress-busting fun. Mix the biscuits and the melted butter together, then press them into your tin as evenly as possible. Chill while you make the filling.
  3. In a large bowl or stand mixer, blend the cream cheese, orange zest, and icing sugar until smooth. Add the cream and beat until the mixture has thickened a little. Gently fold in half your roasted rhubarb, saving the rest for decoration. Spread the filling evenly over the base and chill until set, six hours or overnight.
  4. Finish the cheesecake with segments of the zested oranges and the remaining rhubarb.
DSC_0026

Oreo Cookie Brownies

First off, I have to tell you that these brownies are not my invention. They are my version of a very American thing called Slutty Brownies. I just… hate that name. I know that it’s different if you’re talking about baked goods rather than humans, but even so, ‘slutty’ is a horrible, derogatory word used almost exclusively to insult women, so, I’m out. Anyway, their original name doesn’t tell you what they are. Yeah, Oreo Cookie Brownies might not be as catchy a title, but it doesn’t use any offensive words and it tells you what you’re eating.

DSC_0029-1024x683

There are lots of American recipes for these floating round on the web, and they are pretty much all based on the premise of boxed cake mixes. Have any of you ever tried a box mix? I haven’t – not really from cake snobbery, I’m actually kind of curious – but because it has never occurred to me to buy one. Anyway, I think they’re much more of a Thing in the US than they are here in the UK. Hence, most other recipes for these delightful brownies involve making a boxed cookie mix, topping it with Oreos, and then making a boxed brownie mix and pouring it on top.

I admit, my way takes a little bit more work. But not much more! Cookie dough and brownie batter are both really quick to put together. And it’s much cheaper to make them from scratch with ingredients you probably already have lying around than it would be to buy two boxed mixes.

DSC_0017-1024x683

Having said all that, writing this has made me curious about boxed mixes, and now I am wondering if I should try one. You know, just to see if I am missing anything. Maybe that would be a fun idea for a Taste Test post? Buy all the boxed brownie mixes I can find, then make them all, then… well, nothing good would come of that really, would it?

DSC_0014-1024x683

Notes

You could, of course, ignore everything I have just said and do this with two boxed mixes if you like.

Also, I haven’t tried it yet, but I feel like Reese’s Peanut Butter Cups would also be excellent in here in place of the Oreos, should you be that way inclined.

Do try to start with room temperature butter if you can. It really speeds everything up. Also, you should pretty much always be baking with room temperature eggs.

Ingredients

cookie layer
165g butter, softened
130g light brown soft sugar
65g caster sugar
1/2 tsp vanilla extract
2 large egg yolks
215g plain flour
1 tsp fine sea salt

Double sleeve of Oreos – my tin takes 16

brownie layer
200g dark chocolate, 70% cocoa solids
140g butter
225g caster sugar
2 eggs, plus 1 extra yolk
1 tsp vanilla extract
100g plain flour

Method

  1. Preheat your oven to 180C/160C fan/ gas 4. Grease and line a 20cm square tin. You’ll make your cookie layer first, but start by putting your 200g dark chocolate and 140g butter for the brownies in a bowl over a pan of simmering water to melt gently in the background.
  2. Now, get on with your cookie layer. Beat your butter, light brown soft sugar, and caster sugar together until evenly combined and light – I do this in a stand mixer but electric beaters or a wooden spoon will do the job. Beat in your vanilla and egg yolks until evenly combined. Finally, mix in your flour and salt. Press your cookie dough mix in an even layer into the base of your tin.
  3. Place Oreos on top of the cookie dough. My tin takes 16 but just place as many as comfortably fit in a grid in a single layer on top of the dough.
  4. On to the brownies. Your chocolate and butter should be nicely melted together by now, so take them off the heat. With an electric beater or by hand, beat in your sugar. When combined, beat in your eggs and extra yolk with the vanilla – keep beating for a couple of minutes until it’s smooth, glossy, and sightly lightened and thickened. Finally, fold in your flour. Pour your brownie batter on top of your cookie dough and Oreos and smooth the top.
  5. Bake for 25 minutes, or until the brownie layer is firm around the edges (it will probably start to crack a little at the sides, which is fine). It’s okay for it to seem soft in the middle, but you don’t want completely raw batter. Eat hot and gooey from the pan, or chill to set for a couple of hours and then cut into neat squares.
DSC_0168

Oatmeal Rum Raisin Cookies

I initially made these cookies by accident. I was making a huge batch of various baked goods for an event. The kitchen was completely full of finished and half-made delicious things, with trays of macarons and cooling cakes on every surface (my tiny kitchen doesn’t really have many surfaces). I was making a pan of brownies that had a cookie dough base and Oreos in the middle, and I messed up the quantities and ended up with a load of spare cookie dough. Maths is not my strong point.

DSC_0164-1024x683

So I had this plain cookie dough without a purpose, and no time to think properly about what to do with it. I had raisins. I had oats. I had rum. The cookies were born.

The first time I made these, I threw the ingredients in randomly, without measuring, and didn’t pay much attention because I was making loads of other things too. And they were amazing. So very good. I had to give them away to stop myself from eating them all immediately.

DSC_0193-1024x683

So I was then faced with the task of recreating the cookies of joy. I mean, you know, there have been worse tasks. I played around for a bit, and this is what I came up with. Unfortunately I can never make them again, unless I’m prepared to eat an entire batch of oatmeal rum raisin cookies myself very quickly.

DSC_0201-1024x683

Notes

This recipe makes around 20 generously sized cookies.

Ingredients

150g raisins
75ml rum
250g butter, softened
200g light brown sugar
100g caster sugar
1 tsp vanilla extract
3 large egg yolks
325g plain flour
1 tsp fine sea salt
1 tsp bicarbonate of soda
1 tsp cinnamon
1 tsp allspice
a little grated whole nutmeg
120g oats

Method

  1. Pop your raisins and rum together in a bowl to soak. Line a baking tray which will fit in your freezer with parchment paper. In your largest bowl or in a stand-mixer, beat the butter and both types of sugar together until just combined and even, then beat in the vanilla and egg yolks – all at once is fine. Add your flour, salt, bicarbonate, cinnamon, allspice, and nutmeg. Mix to form firm dough. Finally, fold in your oats, raisins, and any un-absorbed rum.
  2. Using a small ice cream scoop, scoop the dough into golf ball sized rounds and pop them on your lined tray. Freeze for an hour, or up to a month.
  3. Heat your oven to 180C/ 160C fan/ gas 4, and take the cookies out of the freezer. Spread the frozen dough between three or four lined baking trays – you need to give them a lot of space to expand.  Bake for 15-20 minutes, until the outsides of the cookies are baked and crispy, but the insides still feel soft and underbaked. Let them rest on the counter to firm up for at least 10 minutes. Eat with reckless abandon.
DSC_0083

Pear and Berry Crumble with Oats and Spelt

After last week’s crumble recipe, I thought it was high time for another crumble. It’s been a whole week, guys. I could barely cope. Anyway, this is a pear and berry crumble, not an apple crumble. Totally different thing.

Okay, you’re right, it’s not a totally different thing. I just wanted to show you how you can use the same method and proportions but tweak the ingredients to make a different dish. Also, I wanted to eat two crumbles.

DSC_0063-1-1024x667

I’m not trying to tell you this is low-calorie or health food, but it is a different beast to last week’s crumble. I’ve used wholemeal spelt flour instead of plain, skipped the booze, added oats, and packed it with berries. Instead of eating this with ice cream, I like it with Greek yoghurt. Probably because of the oats, I tell myself it has a more breakfast-y vibe.

DSC_0089-1024x683

Anyway, when it’s grey and January-ish outside and we’ve all had to get back to work, there’s absolutely nothing better than a warm bowlful of pear and berry crumble joy. Trust me. Also trust James, who liked this so much that he got viciously possessive about it, like when you corner a cat with a mouse and it looks at you distrustfully because it thinks you will take it away.

DSC_0092-683x1024


Notes

This will make 6-8 portions. I am not saying it will feed 6-8 people, because we can happily polish this off between the two of us. Not in one sitting. I think pear and berry crumble makes a great breakfast. This one is practically porridge.

The whole point of these recipes is to show you that you can adapt crumble as you see fit – do try your own twist on this, using whatever fruits, nuts, flours, or sugars you fancy.

Ingredients

for the crumble topping

240g wholemeal spelt flour (or use half wholemeal and half spelt, if you prefer)
120g light brown soft sugar
130g cold butter, cut into pieces
100g oats

for the base

6 pears
70g unsalted butter
70g demerara sugar
250g mixed frozen berries
1 tsp ground cinnamon

Plain Greek yoghurt, to serve

Method

  1. Heat your oven to 190C/170C fan/gas 5. Tip the flour and sugar into a large bowl. Add the butter, then rub into the flour with your fingers until you reach breadcrumb texture. Stir in the oats. Spread the crumble evenly over a baking sheet and bake for 15 minutes, or until lightly coloured.
  2. Meanwhile, for the base, peel, core and cut the pears into chunks. Put the butter and sugar in a large saucepan and melt together over a medium heat. Cook for a couple of minutes until everything is dissolved, and the mixture is a caramel colour. Stir in the pears, and cook for 5 minutes. Add the berries (still frozen is fine) and cinnamon, and cook for 5 minutes more. Tip the mixture into your chosen crumble dish.
  3. Top the fruit with your crumble. Cook the whole thing in the oven for around 15 minutes, or until hot through, golden, and bubbling. Serve with plain Greek yoghurt.
DSC_0138

Caramel Apple Crumble

Hello January. My last recipe was a healthy salad option. This is a decadent and delicious crumble. Absolutely packed with warming buttery goodness. As you might be able to tell, I don’t really go in for the whole health kick January thing. Yes, some post-Christmas moderation is absolutely fine, if that’s what you want to do to feel better in yourself. But cutting out entire food groups is the road to sadness. January is hard enough for us all without ditching stuff that can bring us pleasure. I plan to spend January eating plenty of tasty homemade food, and that will include salads and soups and stews and fish, but also crumbles and brownies and pie. Because I’m a realist (about this, anyway).

DSC_0129-1024x683

Also, I love crumble. Humble crumble is an underrated dessert. But god, it’s just so delicious. And easy. And adaptable. This week I am bringing you this classic apple crumble number with a caramel and calvados twist. Next week, I am going to bring you a completely different crumble recipe. It will use the exact same proportions and method, but I’ll tweak the ingredients to make a different dish.

DSC_0142-1024x683

As I write this, it’s flat and grey outside. The trees are bare. It’s pouring with rain. The cat is bored and fed up of hanging out with me, but doesn’t want to leave because the weather is so grim, so she’s just giving me evil looks as if I am the one who has ruined the outside world. This is the morning that most people have gone back to work – as, indeed, have I, but I get to do the work from my living room. This month can be rough on us all, so let’s try to be kind to ourselves and each other. For instance, I am going to continue to lavish affection on the cat, even though she keeps sitting on the keyboard while I am trying to type because she’s cross that I’m working instead of playing with her. Baby steps.

DSC_0156-1024x683

Notes

Once you have the basic proportions and method down, you can do a million different things with a crumble recipe. I’ll give you another example next week. Because I care about you all.

This will make 6-8 portions. I am not saying it will feed 6-8 people, because we can happily polish this off between the two of us. Not in one sitting. I think crumble makes a great breakfast.

Ingredients

For the crumble topping

240g plain flour
120g golden caster sugar
130g cold butter, cut into pieces
100g hazelnuts, blitzed in food processor or finely chopped

For the base

200g sultanas
100ml calvados (or brandy of your choice, or feel free to skip the alcohol)
6 medium eating apples
70g unsalted butter
70g light brown soft brown sugar
2 tsp ground cinnamon
100g caramel (homemade or from a jar)

Cream or ice cream, to serve

Method

  1. Pop the sultanas and the calvados in a bowl together so the sultanas can absorb some of the alcohol.
  2. Heat your oven to 190C/170C fan/gas 5. Tip the flour and sugar into a large bowl. Add the butter, then rub into the flour with your fingers until you reach breadcrumb texture. Stir in the hazelnuts. Spread the crumble evenly over a baking sheet and bake for 15 minutes, or until lightly coloured.
  3. Meanwhile, peel, core and cut the apples into chunks. Put the butter and sugar in a large saucepan and melt together over a medium heat. Cook for a couple of minutes until everything is dissolved, and the mixture is a caramel colour. Stir in the apples, and cook for 5 minutes. Add the sultanas, any remaining alcohol that hasn’t been absorbed, and cinnamon, and cook for 5 minutes more. Tip the mixture into your chosen crumble dish. Dot it with spoonfuls of the caramel.
  4. Top the fruit with your crumble. Cook the whole thing in the oven for around 15 minutes, or until hot through, golden, and bubbling. Serve with cream or ice cream.
DSC_0145

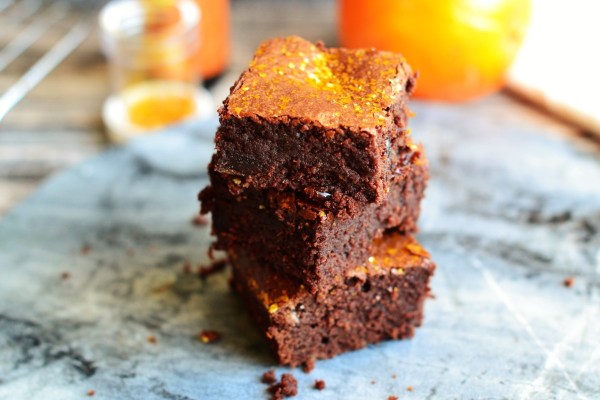
Mulled Wine Brownies

I know what you’re thinking. This blog just doesn’t have enough brownie recipes. I agree. It’s a serious problem. Don’t worry, I’m here to help. Mulled wine brownies it is.

DSC_0093-683x1024

I was never really a huge fan of mulled wine until they gave us some of the really good stuff at culinary school and it was one of the most delicious things I have ever had to drink. Now I have developed a taste for it and have a highly positive opinion of mulled wine flavoured things. Hence, these brownies.

DSC_0131-1024x683

Because I have a whole cupboard full of cake ingredients, I have edible glitter to hand at all times, but obviously it tastes of nothing and I only added it to these brownies to make them sparkly. Because it’s Christmas (almost). And it feels right and proper to put glitter on everything.

DSC_0139-1-1024x683

Ingredients:

140g butter
200g good quality 70% dark chocolate
225g golden caster
2 eggs, plus 1 egg yolk
1 tsp almond extract
120ml red wine
zest of 1 orange
110g plain flour
generous grating of whole nutmeg
1/4 tsp ground cloves
1/2 tsp ginger
1/2 tsp cinnamon
75g dried cherries

Method:

  1. Break your chocolate into pieces and chop your butter into rough cubes. Place them both in a glass or metal bowl over a pan of gently simmering water and leave them to melt, stirring occasionally. Preheat your oven to 180C/160C fan/gas 4. Grease and line a 20x20cm square tin.
  2. While your chocolate and butter melt, weigh your sugar, and mix your eggs with your extra yolk and your almond extract. When your chocolate and butter have completely melted, beat in your sugar (I use an electric hand whisk), followed by your eggs. Add your red wine and orange zest. Add your flour and spices to the mixture and beat that in too. Stir through your dried cherries.
  3. Pour the mixture into the tin and smooth the surface. Bake for around 20-25 minutes. The brownies will have risen and started to crack a little round the edges, but still be soft in the middle. They will firm as they cool.