DSC_0006-1

Easter Rocky Road

One more quick Easter recipe for you. Yes, it’s basically just Rocky Road – but the Easter version. So it’s automatically even greater. And it takes ten minutes to put together. And very little skill. And I’m tired, okay, so unfortunately for you, this lazy recipe is all you get today. The Hot Cross Cookies were a slightly more respectable attempt at Easter baking.

DSC_0024-670x1024

I barely ever make Rocky Road actually, because a) James loves it, and b) I am lukewarm about it. This makes me sound very selfish, but truly, James doesn’t really want me to make it often because it means I’ll come home one day and find him sitting on the floor in the kitchen with chocolate all over his face, an empty tin clutched in his sticky fingers, and a wild look in his eyes. I’m being cruel to be kind.

DSC_0034-683x1024

I don’t quite know what’s so joyful about Easter eggs, but they’re magical. Even if it’s completely standard chocolate that you wouldn’t normally look twice at, somehow having it in an egg shape makes it incredibly appealing. This follows through to mini eggs too. I don’t know why, but I find them totally irresistible. So, even though I am lukewarm about Rocky Road, I ate quite a lot of this batch.

DSC_0055-1-1024x683

Notes

I’m not going to pretend this is a particularly inventive or difficult thing to make. It’s just normal rocky road plus Easter eggs. You can substitute anything else when we’re not in Easter season.

Ingredients

125g butter
300g chocolate – dark, milk, or a mixture depending on your taste
3 tbsp golden syrup
200g oat biscuits (or whatever biscuits you like)
100g marshmallows (cut them in half if they’re big ones)
150g mini eggs
2 tbsp icing sugar (for dusting)

Method

  1. Line a 20cm square tin with baking paper and make sure you have space to fit it in your fridge.
  2. Put your butter, chocolate, and golden syrup in a large saucepan and melt over a medium heat. While everything is melting, put your biscuits in a freezer bag and bash them with a rolling pin to break them up a bit, leaving some chunky pieces. When the chocolate mix is melted, stir the biscuits and marshmallows into it.
  3. Reserve a handful of your mini eggs, then roughly chop the rest and mix them into the chocolate. Spread the mixture out evenly in your lined tin and flatten the top. Push your reserved mini eggs into the surface of the rocky road, then pop the whole thing in the fridge to set for a couple of hours.
  4. When it’s set, dust the top with icing sugar, cut it into squares, and serve.
DSC_0018-1

Hot Cross Cookies

Let’s get the obvious thing out of the way first. I suck at piping white chocolate. Try to ignore how messy these look, and appreciate that hot cross cookies are an excellent addition to the Easter baking roster. I am a big fan of Easter brownies, and generally go for the ‘add creme eggs and mini eggs and it’s a done deal’ school of Easter baking.

DSC_0001-1024x683

But sometimes, you’ve got to mix it up. I love hot cross buns passionately, but there’s no denying they’re a bit of a faff to make. They’re not stupidly difficult or anything, but as with most breads you have to wait for things to rise and prove and so on. And sometimes (okay, often) I am just too impatient for such things. Enter: hot cross cookies.

DSC_0027-1024x683

Notes

This recipe makes around 20 generously sized cookies.

If, like me, you live in a two person household, and don’t want to bake 20 cookies at once because you know you will just eat them all, I have a solution for you. Freeze all the cookie dough (i.e. get up to the end of step 2 in the recipe), then bake the cookies off in batches of two or four or whatever is manageable for the next few weeks. You will have delicious freshly-baked cookies in fifteen minutes in small batches.

Ingredients

250g butter, softened
200g light brown sugar
100g caster sugar
3 large egg yolks
325g plain flour
1 tsp fine sea salt
1 tsp bicarbonate of soda
2 tsp cinnamon
1 tsp allspice
100g mixed peel (should come diced but chop it finely if not)
100g raisins or sultanas
75g white chocolate

Method

  1. Line a baking tray which will fit in your freezer with parchment paper. In your largest bowl or in a stand-mixer, beat the butter and both types of sugar together until just combined and even, then beat in the egg yolks – all at once is fine. Add your flour, salt, bicarbonate, cinnamon, and allspice. Mix to form firm dough. Finally, fold in your mixed peel and sultanas.
  2. Using a small ice cream scoop (or spoons, or your hands…) scoop the dough into golf ball sized rounds and pop them on your lined tray. Freeze for an hour, or up to a month.
  3. Heat your oven to 180C/ 160C fan/ gas 4, and take the cookies out of the freezer. Spread the frozen dough between three or four lined baking trays – you need to give them a lot of space to expand.  Bake for 15-20 minutes, until the outsides of the cookies are baked and crispy, but the insides still feel soft and underbaked. Let them rest on the counter to firm up for at least 10 minutes. Remove to wire racks to cool completely before piping on your chocolate.
  4. Melt your white chocolate however you see fit (in a bowl over a pan of simmering water is safest, but I often just microwave on medium power in short bursts for such small amounts). Pop it in a piping bag (or a sandwich bag), snip off the end, and pipe crosses onto your cool cookies. Alternatively, skip the cross thing and just drizzle them recklessly with chocolate. Less Easter-themed, but slightly easier.
DSC_0026

Oreo Cookie Brownies

First off, I have to tell you that these brownies are not my invention. They are my version of a very American thing called Slutty Brownies. I just… hate that name. I know that it’s different if you’re talking about baked goods rather than humans, but even so, ‘slutty’ is a horrible, derogatory word used almost exclusively to insult women, so, I’m out. Anyway, their original name doesn’t tell you what they are. Yeah, Oreo Cookie Brownies might not be as catchy a title, but it doesn’t use any offensive words and it tells you what you’re eating.

DSC_0029-1024x683

There are lots of American recipes for these floating round on the web, and they are pretty much all based on the premise of boxed cake mixes. Have any of you ever tried a box mix? I haven’t – not really from cake snobbery, I’m actually kind of curious – but because it has never occurred to me to buy one. Anyway, I think they’re much more of a Thing in the US than they are here in the UK. Hence, most other recipes for these delightful brownies involve making a boxed cookie mix, topping it with Oreos, and then making a boxed brownie mix and pouring it on top.

I admit, my way takes a little bit more work. But not much more! Cookie dough and brownie batter are both really quick to put together. And it’s much cheaper to make them from scratch with ingredients you probably already have lying around than it would be to buy two boxed mixes.

DSC_0017-1024x683

Having said all that, writing this has made me curious about boxed mixes, and now I am wondering if I should try one. You know, just to see if I am missing anything. Maybe that would be a fun idea for a Taste Test post? Buy all the boxed brownie mixes I can find, then make them all, then… well, nothing good would come of that really, would it?

DSC_0014-1024x683

Notes

You could, of course, ignore everything I have just said and do this with two boxed mixes if you like.

Also, I haven’t tried it yet, but I feel like Reese’s Peanut Butter Cups would also be excellent in here in place of the Oreos, should you be that way inclined.

Do try to start with room temperature butter if you can. It really speeds everything up. Also, you should pretty much always be baking with room temperature eggs.

Ingredients

cookie layer
165g butter, softened
130g light brown soft sugar
65g caster sugar
1/2 tsp vanilla extract
2 large egg yolks
215g plain flour
1 tsp fine sea salt

Double sleeve of Oreos – my tin takes 16

brownie layer
200g dark chocolate, 70% cocoa solids
140g butter
225g caster sugar
2 eggs, plus 1 extra yolk
1 tsp vanilla extract
100g plain flour

Method

  1. Preheat your oven to 180C/160C fan/ gas 4. Grease and line a 20cm square tin. You’ll make your cookie layer first, but start by putting your 200g dark chocolate and 140g butter for the brownies in a bowl over a pan of simmering water to melt gently in the background.
  2. Now, get on with your cookie layer. Beat your butter, light brown soft sugar, and caster sugar together until evenly combined and light – I do this in a stand mixer but electric beaters or a wooden spoon will do the job. Beat in your vanilla and egg yolks until evenly combined. Finally, mix in your flour and salt. Press your cookie dough mix in an even layer into the base of your tin.
  3. Place Oreos on top of the cookie dough. My tin takes 16 but just place as many as comfortably fit in a grid in a single layer on top of the dough.
  4. On to the brownies. Your chocolate and butter should be nicely melted together by now, so take them off the heat. With an electric beater or by hand, beat in your sugar. When combined, beat in your eggs and extra yolk with the vanilla – keep beating for a couple of minutes until it’s smooth, glossy, and sightly lightened and thickened. Finally, fold in your flour. Pour your brownie batter on top of your cookie dough and Oreos and smooth the top.
  5. Bake for 25 minutes, or until the brownie layer is firm around the edges (it will probably start to crack a little at the sides, which is fine). It’s okay for it to seem soft in the middle, but you don’t want completely raw batter. Eat hot and gooey from the pan, or chill to set for a couple of hours and then cut into neat squares.
DSC_0210

The Taste Test: Chocolate Digestives

We’re back! And we’re back with biscuits. I thought I’d ease us in with something classic and beloved. And who doesn’t love a chocolate digestive? If you answered ‘me’ to that, then there is no place for you here, I’m afraid. This taste test post will not be to your liking.

This is one of those taste tests where there is a clear brand leader. When you think of chocolate digestives, you most likely think of McVitie’s. I certainly do, anyway. And before I got into this taste test mentality, it never would have occurred to me to try another brand. I’d just automatically go for the one I knew. But it’s definitely something that’s worth thinking about, considering the McVitie’s biscuits are more than twice as expensive as the Aldi version. Are they twice as delicious? Find out below.

As before, I feel I need a rambling disclaimer: obviously, I am doing this in my kitchen and not in a lab and I am not a scientist. These are the opinions of one person – that said, one person who has been trained to taste for quality. Also, the products used in this series are just examples – obviously each supermarket has, say, eight or nine different types of chocolate biscuit or whatever the product may be, and I’m not going to try every single one because what am I, made of money?

Finally, I should highlight that I tasted all the products blind, and at the time of tasting and making my notes I didn’t know which product came from which shop. I sat in one room while my glamorous assistant (er, my husband), prepared the samples in another. Any notes added regarding packaging and so on were only done after blind tasting, when I learned which who had made product A, B, C, D, or E.

The Blind Taste Test: Milk Chocolate Digestives

DSC_0248-1024x716

Milk Chocolate Digestives
per 100g
£
kcal
fat
carb
fibre
protein
salt
Tesco
0.20
511
25.8
61.6
2.6
6.9
0.8
Sainsbury’s
0.21
499
23.0
65.1
2.4
6.6
0.78
Waitrose
0.23
498
23.7
63.3
2.9
6.5
1.00
McVitie’s
0.33
495
23.6
62.2
3.0
6.7
1.0
Belmont – Aldi
0.15
485
23
62
2.5
7.0
0.6

A – Tesco – 6/10

  • The chocolate looked slightly darker on this biscuit than the others. The biscuit itself was very crumbly and soft, going to crumbs in my hands if I applied pressure. Maybe a bit too soft – you want a bit of crispness with your biscuit. But a decent thick layer of chocolate and tasted perfectly fine.

B – Sainsbury’s – 6/10

  • Immediately more snap than A. Much crisper. However, it felt like a thinner layer of chocolate than A – basically, the opposite to A in terms of biscuit/chocolate. Both had flaws, but both decent biscuits.

C – Waitrose – 7/10

  • Thicker chocolate than B, and a good crispness to the biscuit. The biscuit itself also had a slight hint of saltiness to it, which offset the sweetness of the chocolate well. My second favourite.

D – McVitie’s – 6/10

  • Like B, a thinner chocolate, but tasted fine. A decent snap to the biscuit – probably the second crispest of the bunch. Nothing too exciting though.

E – Belmont for Aldi – 8/10

  • A satisfying, thick layer of the chocolate. A good snap, not falling apart, didn’t have loads of crumbs coming off it. The crispest biscuit of them all, with plenty of flavour and an oaty texture. More texture than any of the other biscuits. My favourite.

Conclusion

At first glance, all of these biscuits looked pretty similar – maybe the chocolate on A and E was shade darker than the others, and it was spread a little differently on all of them. But, in essence, much of a muchness. However, when you got into the tasting there were significant differences. It turned out the the Aldi offering, by far the cheapest by weight, was my favourite.

The other thing to note, though, was that none of these were terrible. They were all perfectly decent and edible chocolate biscuits. And, really, even a chocolate biscuit that’s just ‘reasonable’ is still a chocolate biscuit. The main thing to note, though, was that the most expensive brand leader was certainly no better than the bunch. Next time you’re buying chocolate digestives, you might as well get the cheaper option – they’re really just as good and, in some cases, better.

DSC_0110-1

Peanut, Banana, and Caramel Brownies

I would be exaggerating if I said my favourite thing about our trip to Seville was the peanut, banana, and toffee brownie I ate at Regadera. But it was definitely among my top five favourite things of the holiday. That and the kitten we met. And, uh, the architecture. Obviously.

I knew I wouldn’t be able to recreate it exactly at home. Part of the joy of that particular dessert was delivered in the form of an incredible banana ice cream, and I don’t have an ice cream maker. But I couldn’t get the idea of a peanut, banana, and caramel brownie out of my head. Yes, it seemed like a lot of ingredients to throw at a brownie. But I know that chocolate and banana are good together. And that banana and peanut butter are good together. And that banana and caramel are good together. I mean, it at least didn’t seem like a terrible idea.

DSC_0119-1024x683

I’ve made chocolate banana bread many times before, so I was hoping that the bananas in brownies idea would work in a similar way – that the bananas would make the brownies even more moist, dense, and fudgy. And, happily, this is exactly what they did.

These brownies are undoubtedly a bit much for some people. There are plenty of purists who like their brownies plain, perhaps with one addition if they’re going wild. But, as you might be able to tell if you’ve read this blog at all, I’m not really one of those people.

DSC_0147-1024x683

Notes:

If this is all a bit much for you, you could skip out one of the peanut/banana/caramel triumvirate. But I promise it’s tasty.

Brownies keep really excellently well in the freezer. You can make a batch, cut them, freeze them, then whip one out and microwave it for thirty seconds every time the brownie urge strikes.

Ingredients:

200g 70% dark chocolate
140g butter
200g caster sugar
2 eggs
100g plain flour
2 very ripe bananas, mashed
100g roasted peanuts
3 tbsp peanut butter
5 tbsp salted caramel (buy in a jar or make your own)

Method:

  1. Break your chocolate into pieces and chop your butter into rough cubes and place them both in a glass or metal bowl over a pan of gently simmering water. Leave them to melt, stirring occasionally. Preheat your oven to 180C/160C fan/gas 4. Grease and line a 20x20cm square tin.
  2. When your chocolate and butter have completely melted, beat in your sugar (I use an electric hand whisk), followed by your eggs. Add your flour to the mixture and beat that in too. Mix in your bananas, then stir through your peanuts and peanut butter.
  3. Pour the mixture into the tin, smooth the surface, and then dollop your salted caramel on top of the batter and swirl it around with a knife or skewer. Bake for around 25 mins – the salted caramel will sit in a liquidy way on top of the batter and make you think the brownies are not done, but they will firm as they cool.
  4. Normally I advocate eating brownies warm from the pan, and while you absolutely can do that here, they will be very gooey. If I need to slice these neatly or take them anywhere I normally let them chill and firm in the fridge for a couple of hours first.
DSC_0069-1

Chocolate Caramel Skillet Cookie

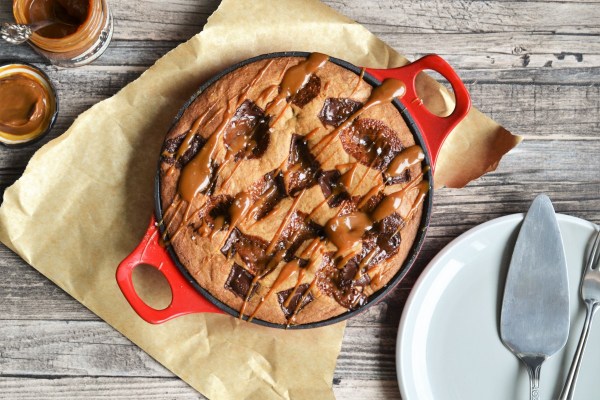
I’ve seen pictures of skillet cookies all over the internet for ages, and I’ve always been a bit scared of them, conceptually. And, thinking about it, it’s only because the term skillet kind of confused me. I always sort of thought I didn’t have a skillet. But it turns out that a skillet is just a frying pan. I have lots of frying pans. All you need for this is a frying pan you can put in the oven, and then you’re away. There is very little standing between you and a giant chocolate caramel skillet cookie right now.

DSC_0067-1024x683

The joy of this recipe is that it’s incredibly easy. It’s actually simpler than making regular cookies (which is pretty simple anyway), because you don’t have to bother with shaping individual balls of dough, or with chilling your mixture down. It’s quicker than most cake batters. It bakes up very quickly in the oven. And then you don’t have to bother with turning it out, like a normal cake. The charm of the chocolate caramel skillet cookie is that you can serve the whole thing at the table. Or, er, on the sofa. You know, if you were eating it by yourself. Which obviously you wouldn’t do. Nope.

DSC_0111-1-683x1024

It’s called a cookie, but really this is a bit of a cake and cookie hybrid. The texture is not quite cookie, but not quite cake either. Or, to put it another way, it’s the best of both worlds. Cookie and cake in one. What more could you ask for?

DSC_0116-1024x683

Notes:

As with any cookie, you can add whatever you like to this. I have kept it simple here, but any chocolate you have would be lovely in this recipe, as would the addition of nuts.

I had a jar of dulce de leche to hand, but caramel would work too, and you could of course make it from scratch (my recipe is here, if you like).

I didn’t grease my skillet because it’s non-stick, but if yours isn’t then I advise greasing it well with butter.

Ingredients:

150g butter, cubed
100g brown sugar
50g caster sugar
1 egg, whisked
1 tsp vanilla extract
230g plain flour
1 tsp baking powder
pinch of salt
100g 70% dark chocolate, roughly chopped
50g caramel or dulce de leche

Method:

  1. Heat your oven to 190C/170C fan/ gas 4. Melt your butter and both sugars together in a large saucepan gently, then take off the heat and let cool when combined.
  2. Whisk your egg and vanilla together in a small bowl, then stir it into the butter and sugar mix, making sure the butter isn’t too hot (you should be able to comfortably put your finger into it). Sieve your flour, baking powder, and salt over the mixture, and stir to combine.
  3. Spread your cookie mixture into medium skillet (mine was 20cm diameter), then press chocolate chunks into the top and dot with spoonfuls of caramel. Bake for around 15-20 minutes, or until the top of the cookie is golden and crispy,  but the inside is soft. Finish with a drizzle more caramel and a sprinkle of sea salt, then let everyone dig in. It’s great with ice cream too.
DSC_0051

The Bake Off Bake Along: Cannoli

I have very strong feelings this week. Some of these feelings are related to the fact that Yan definitely should not have left the tent. I adore Yan and I would have been very happy if she’d have won. I really like Kate too, but I think she was weaker than Yan for Italian week and has been struggling for a little while, as has Stacey. It seems ridiculous than Yan went out, so much so that I got quite cross with Paul and Prue. But the bake off bake along must go on, and cannoli are happening.

DSC_0075-1024x683

This is the other thing I have strong feelings about this week: what they made in the tent. I felt like it wasn’t a great episode and the challenges didn’t hang together very well. Sfogliatelle didn’t seem like a great showstopper assignment, really, because most people don’t know what they are and don’t have a chance of making them, and because even when they’re made correctly they just don’t look very interesting. Pizza is too simple and dull for a technical challenge, especially when you have the bakers just make a margherita. I mean, pizza is great, but I’ve made it so many times that it’d be no fun for me to do as a bake along. And there didn’t seem to be much leeway given for the fact that it was stupidly hot in the tent. Also, with the budget for this show, surely they can afford to air-condition the marquee? Or put in big fans? Or even just open the sides?! It’s almost like they’re trying to make the bakers suffer.

DSC_0094-1024x683

But. But. The thing that redeemed this episode for me is that it included cannoli. I love cannoli. I have said it before and I will say it again. They are one of my absolute favourite desserts. But I have never made them before, because they look really hard. I don’t have a deep fat fryer. And you have to have cannoli tubes, and who has those?

Well, me. Now I have those. I purchased cannoli tubes for this bake off bake along. Which is nuts. But this felt like the time to finally bite the bullet and do it, because I have always wanted to be able to make cannoli myself.

Not going to lie: making cannoli is fairly labour intensive. It also requires quite a bit of kit. The dough itself isn’t too hard to put together, but then you need a pasta machine to make it thin enough to work with. As with fresh pasta, yes, you could use a rolling pin, but it would take a lot of time and effort to get the dough as thin as it should be. You’d then have a much easier time of it if you had a deep fat fryer. I don’t, so I just deep-fried my cannoli tubes in a pan of oil on the hob, and kept an eye on the temperature with a sugar thermometer, but it was quite hard to regulate and a fryer that kept a consistent temperature would have been so much easier. Finally, you do need cannoli tubes. Luckily they’re really cheap, but I did have to go to the effort of actually ordering them online.

So, all in all, this was a stupid thing to do. But they were so tasty. I was very proud of my little cannoli shells, which bubbled and went golden and crisp, exactly as Paul and Prue had said they should. I feel like making cannoli in and of itself was enough of a challenge, so I haven’t made three different types. I sort of intended to, but when it came down to it I just ran out of time. I stuck with classic flavours: ricotta; mixed peel; dark chocolate. Happy days. They were really delicious, and I was actually quite proud of myself, which I’m not usually after these bakes!

DSC_0116-1-659x1024

The Recipe

Obviously I didn’t have a clue what I was doing here, so I slavishly followed this recipe. It all seemed to work without any issues, although I did end up adding some extra flour to the dough, because it seemed a bit too sticky and difficult to work with at first. I also dipped the ends of the cannoli tubes in chocolate because… well, because dipping things in chocolate means never having to give a reason.

Sadly, cannoli don’t keep very well, because as soon as you pipe the ricotta mix into the shells they start to soften and go soggy. It just means you have to eat them all very quickly. Which is tragic, obviously.

DSC_0068

The Bake Off Bake Along: Chocolate Peanut Butter Fondants

Ah, pudding week. Always a great time for the bake off bake along, particularly as we come into autumn. The temperature outside is dropping, and staying inside with a fluffy blanket and a selection of puddings seems only right and proper. I am a big fan of the steamed pudding, and I was all set to make one of those. Until the technical challenge came along. And it was chocolate fondants. Or molten chocolate cakes, or whatever Paul is calling them these days. (We’re not even going to talk about the showstopper, obviously).

Anyway, I wasn’t going to pass up the chance to make a chocolate fondant. They are one of my absolute favourite things. And filled with peanut butter? Does life get any better? Don’t answer that. If sitting cross-legged on the living room floor in my pajamas eating chocolate fondant for breakfast at 9am on a Sunday morning is wrong, then I don’t want to be right.

DSC_0066-1024x683

I’m becoming pretty attached to this year’s crop of bakers now. Sophie is adventurous and awesome. She was in the Army and she’s training to be a stuntwoman! Who wouldn’t want to be friends with her? Liam is adorable and funny, and I’m always rooting for him to do well. I adore Julia and I love the unique perspective she brings to things, having been raised in Russia. Yan’s flavours always sound great and I really admire her scientific approach to everything. James seemed like a lovely guy, and I was sad to see him go, but it did feel like his time.

DSC_0095-1024x683

But on to chocolate fondants and the bake off bake along. Sometimes people make a big fuss about chocolate fondants being difficult (especially on MasterChef), but really, they’re just undercooked chocolate cakes. As long as you’ve got a good recipe and you know your oven, you’re golden.

On the show, they made their cakes with peanut butter centres, which I am all for. Chocolate and peanut butter are a winning combination. However, I also had some salted caramel left from last week, so I thought I’d do half the fondants with peanut butter and half with salted caramel. I did not regret this decision. I also added some simple berries to bring a bit of contrast and sharpness to the dessert.

Happy, happy days, my friends. Happy days. It’s times like this when I love the bake off bake along.

DSC_0109-1024x720

Source:

My favourite recipe for these is from the great Nigella, and I’ve not changed a great deal because her ratios are perfect.

Notes:

You can skip the contrasting centres and the berries if you like, but both are excellent if you have them lying around

You will need 6 individual pudding moulds, or darioles, for this recipe. It’s really not a tricky thing to bake, but I appreciate that not everyone has darioles. Sadly, I don’t think normal ramekins would work for this, because they’re not as deep, so the puddings would be likely to cook through and you wouldn’t get the molten centre. Darioles aren’t expensive though, if you’d like to have a go at this recipe and you don’t have any to hand…

You can also serve these with cream or ice cream, but honestly, with the liquid centres I don’t think you need anything extra.

This recipe makes six individual puddings. If you don’t need six at once, keep the spares in the fridge until you want to eat them, and cook when you’re ready.

DSC_0118-1024x683

Ingredients:

350 grams good dark chocolate (I like Green & Black’s 70% for this)
50 grams soft butter (plus more for greasing)
cocoa powder, for dusting
150 grams caster sugar
4 large eggs (beaten with pinch of salt)
1 tsp vanilla extract
50 grams Italian 00 flour if you have it, or plain is fine if you don’t (I have tried both and prefer the texture from pasta flour)
6 tsp smooth peanut butter or salted caramel (or both!)
a handful of fresh or frozen mixed berries

Method:

  1. Pop your chocolate in a glass bowl over a pan of simmering water to melt, and stir it occasionally. Preheat your oven to 200C/180C fan/gas 6 and pop a baking sheet in there to heat up (unless you are cooking the puddings later). Butter your six darioles, line the base of each with a little circle of baking paper, then dust them with cocoa powder and tap out the excess.
  2. When your chocolate has melted, take the bowl off the heat to cool a little. In another bowl, cream together your butter and sugar until well-combined. Gradually beat in your eggs and salt, and then your vanilla. Sprinkle the flour over the batter, and then mix again until well combined. Add your melted chocolate, then mix again until well combined and smooth – you should have a fairly thin, glossy batter.
  3. Divide two thirds of the batter between your six darioles, until they’re each around two thirds full, then add a generous teaspoon of peanut butter (or salted caramel) to each. Divide the remainder of the batter between your darioles, covering the filling, and smooth the tops.
  4. If you’re cooking them later, pop your moulds into the fridge until needed. If you’re cooking right away, pop them in the oven for 10 minutes (12 if cooking from the fridge). If you’re serving with frozen berries, just microwave them for one minute until they’re warm and releasing their juices. To serve, turn each pudding out onto a plate, top with a spoonful of berries, and eat immediately.
DSC_0019

The Bake Off Bake Along: Chocolate & Pistachio Caramel Cake

I was embarrassingly excited about caramel week from the moment I heard of its existence. ‘Now that’, I thought, ‘is going to be a fun bake off bake along week’. I mean, who doesn’t love caramel? People who are wrong, that’s who.

Stroopwafels are one of my favourite things ever… but I don’t have a waffle iron. I was very torn. There was a serious moment when I considered buying one (I got to the ‘looking up prices on Amazon’ stage), but it seems a bit too insane and profligate to buy an expensive bit of kit just for the sake of making one bake off bake along technical challenge. Even on caramel week.

Realistically I would never use it again, and in my teeny tiny kitchen every single bit of kit has to be there for a good reason. It’s a bit rubbish, actually, for them to set a technical challenge that requires an obscure bit of equipment, so people at home generally can’t join in. Also, considering that every single person messed up the stroopwafel caramel, I reckon they were either given insufficient instructions or insufficient time. I mean, if half of them messed it up then fine – but all of them?

DSC_0004-2-1024x683

So, down to a choice of two things. I absolutely love a millionaire’s shortbread, but since I have done the signature challenge every single week for the bake off bake along so far, I thought this was perhaps my one chance to give a showstopper a go. You know, when it wasn’t something insane, like a biscuit board game or a bread sculpture. A caramel cake seems pretty reasonable. I make stupid huge cakes fairly often.

It felt like cursing myself to think this, but I have never been particularly scared by the concept of making caramel. One of the things I bake most often is salted caramel brownies, so I make caramel for those all the time. And it hasn’t gone wrong yet. Cue targeted lightning strike from the heavens directed at my kitchen and everything blowing up.

DSC_0048-2-700x1024

It was actually fine. But I did cheat slightly in that I didn’t use a spun sugar decoration. I’ve done spun sugar at culinary school, and I love playing with it, but… well, to be honest, it’s an absolute and total pain cleaning up little bits of spun sugar when they are scattered and hardened all over your kitchen, and now that I’m working full time I have to cram these bake along sessions into sneaky little grabbed hours.

So here we have it: a chocolate brownie and pistachio cake, sandwiched with a salted caramel layer and a pistachio buttercream, decorated with raspberries, homemade honeycomb, and pistachio caramel shards. It’s not the prettiest thing ever. It’s fairly messy, and I was rushing. But it was tasty. And it has caramel, chocolate, and pistachio. And those are three of my favourite things.

DSC_0055-1024x683

So where’s the recipe?

This might be a bit of a cop out, but I’m not sharing the recipe, because it would be incredibly long and complicated. Two different types of cake, salted caramel, pistachio buttercream, honeycomb, pistachio shards… I am assuming no one is going to be casually making this! Do let me know in the comments if you’re particularly after the recipe for any of the elements of the cake and I will happily provide it.

Another week, another bake off bake along done, and enough caramel made to use up all the white sugar in my baking cupboard. And there was a really serious amount of sugar in my baking cupboard.

The story so far: bake along one, two, and three

DSC_0044-2

Ricotta, Citrus, and Chocolate Tart

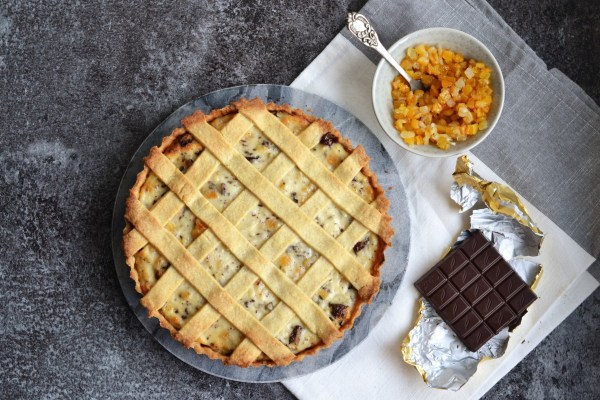
Have you ever eaten cannoli? If not, I advise you to stop reading this blog post and go and find yourself some immediately. There’s a little Italian deli on the Cowley Road in Oxford called Il Principe, and it sells properly lovely and authentic Italian food. I mean, I assume it’s authentic. The owners are Italian and I’m not, so what do I know? Anyway, they do an irresistible cannoli. A crisp, fried tube of delicate pastry, filled with ricotta and mixed peel, finished with dark chocolate and icing sugar. It is one of my favourite treats. And so I was always going to love this Ricotta, Citrus, and Chocolate Tart.

Yes, I know I did a chocolate tart pretty recently. But this is a totally different being.
DSC_0020-1024x683

You may well ask why I didn’t just make cannoli, if I love them so much. The problem is that, although you can buy ready-made cannoli shells, they’re pretty difficult to get hold of. They’re also not a patch on the freshly handmade variety. And to make them by hand you need to buy special cannoli tubes to shape the dough around while it’s fried. Even I, a great lover of kitchen equipment, don’t think I could really justify such a purchase. To make it a legitimate buy, I’d have to make cannoli every week. And while, in principle, that sounds like a fabulous idea, in practice I feel logistical issues and health worries might render it impractical as a lifestyle choice.

DSC_0026-1024x683

The proper name for this recipe is Torta Squisita, according to Amelia, my friend and former colleague. She’s spent half her life in Italy, speaks the language and knows the food. It was she who introduced me to the original recipe for this tart, before I messed with it. I’ve made changes, of course, and fiddled with the method, which is why it’s been rechristened as Ricotta, Citrus, and Chocolate Tart. It’s not as pretty a name. But it tells you what it is, and I don’t want to go pretending my version is the proper Italian deal, because it isn’t. It’s really, really delicious though.

Golden, lemon-scented pastry holds a filling of baked ricotta, studded with candied citrus peel and rich flakes of dark chocolate. It’s decadent, and a little bit unusual if you’re looking for something different. When I make this tart, I have to give it away fairly quickly, because I cannot be trusted around it. It’s genuinely one of my absolute favourite desserts. If left alone with it, I will demolish it single-handedly in an embarrassingly short amount of time.

DSC_0029-1024x683  </a/p>

Source

The original recipe for this tart comes from the lovely Amelia Earl, who I used to work with at the cookery school.

Notes

Making your own pastry for this is best, because this recipe will give you a rich, buttery, lemon-y base for the tart. However, if you’re in a rush or simply cannot be bothered to make your own pastry, then a couple of sheets of shop-bought shortcrust will do as a substitute in a pinch.

If you like, you can completely skip the lattice top to this, and simply bake the tart with an open top.

Ingredients

for the pastry

375g plain flour
pinch of salt
75g sugar
zest of 1 lemon
210g cold butter, cubed
3 egg yolks
4-5 tbsp chilled water

for the filling

500g ricotta
125g candied peel (should come diced into small cubes)
150g good quality 70% dark chocolate, cut into rough rubble
100g golden caster sugar
1 large egg

Method

  1. First, make your pastry. Put your flour, salt, sugar, and lemon zest in a food processor. Give it a quick blitz to combine. Add your cubed butter, and pulse until the mixture resembles breadcrumbs. Add your eggs yolks and 2 tbsp cold water, and pulse until the pastry starts to come together. If it doesn’t come together and still seems dry, add more water 1 tbsp at a time until it is a cohesive pastry. Tip it out onto clingfilm and knead it together briefly. Divide it into two chunks, one being 3/4 of the total pastry and the other 1/4. You can also leave it in one big piece if you don’t want to do a lattice top. Shape each chunk into a disc, wrap in clingfilm. Chill in the fridge for around 20 minutes, or until fairly firm.
  2. While your pastry chills, make your filling. Mix your ricotta, candied peel, dark chocolate, sugar, and egg together until just combined, and set aside. Heat your oven to 190C/170C fan.
  3. Roll out your larger piece of pastry and use it to line a tart tin (roughly 23cm in diameter). Trim the edges. If your pastry has become very soft, pop the tin in the fridge for ten minutes or so to let the pastry firm up before it goes in the oven. When you’re ready, line the pastry case with baking paper, then fill with baking beans or rice, and bake blind for around 10 minutes. Remove the paper and beans and bake for around another five minutes. You want the pastry to have lost its rawness and started to colour lightly.
  4. While the case is baking, if you’re planning to do a lattice top, roll out your smaller piece of pastry into a rough rectangle and cut it into long strips.
  5. When your pastry case is blind baked, pour your filling into the tart case, and smooth the top. If you’re doing a lattice, lay your strips of pastry in your prepared pattern over the filling. You’re supposed to weave them in and out for a proper lattice, but I always just lay them on top of each other! Pop the whole thing back in the oven and bake for around 30 minutes, or until the lattice pastry is baked and golden and the tart filling is set. Let the tart cool for five or 10 minutes, but do remove it from the tin while it’s still warm, or it could stick.