DSC_00651

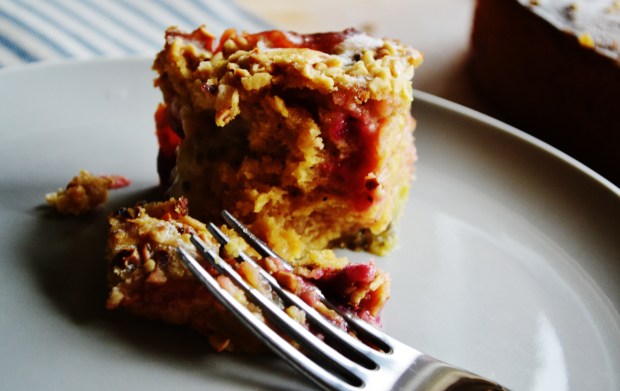
Peach, Raspberry, and Almond Loaf Cake with Cream Cheese Topping

I am not musical at all. I love music, but I can’t read it or produce it in any way. I can’t sing, or play an instrument, or keep time very well. I can’t even dance.

Yet, every Monday, you’ll find me at band practice.

DSC_0020-1024x683

When James and I first got together, I knew he had an unruly folk band. I’m still not totally sure how many people are in it – twelve? thirteen? – because people come and go, and it’s never really clear what everyone’s status is at a given moment. There are people on maternity and paternity leave. People get jobs that take them away from the band for a while, like being in other bands, or taking acting jobs, or working abroad. And that’s part of the joy of the band. You don’t quite know who is going to turn up to a rehearsal, but it’s always enough people to make some sort of music.

I fluttered around the periphery of the group for a little while, and then I starting going to the rehearsals. I initially thought my being there would be a bit pointless. What was the use in showing up when I couldn’t play a thing? But I just sort of… kept going. I sing along in the loud bits where hopefully no one can really hear me, and I mess around with the simplest percussion instruments, and I force huge amounts of food on everyone. I take photographs and videos at gigs and have people round for dinner and go to band parties. Mostly, I chat to people.

DSC_0001-1024x680

The band is a mongrel mash-up of members from completely different backgrounds. The age range spans about thirty years. Some people are trained classical musicians who have jumped from those hallowed heights into folk’s cushioning, beery embrace. Some people are self taught musicians who can’t read music but can play along with anything from Bellowhead to Beethoven to Björk by ear on five different instruments. Some people are scientists, some are actors. We have a counsellor and a software QA engineer, a publishing professional and a policeman.

Even though I’m not really ‘in’ the band, I am at least with the band. I’ll see and talk to people socially, outside of rehearsals. I’ve helped some of them move. They’re all invited to our wedding.

Less than two weeks ago, a band member gave birth to an absolutely beautiful baby girl. I am one of those incredibly annoying people who will coo over babies for hours until their parents gently prise them from my arms so that they can, you know, go home and get some sleep, so I have been ridiculously excited about this pregnancy and the imminent arrival of the baby for months. Tomorrow, I get to go and meet her for the first time.

Of course, I’m not going empty-handed. I asked if I could bake a cake, and the request came in for something summery, with peaches. I couldn’t quite find a recipe that I liked the look of enough to fit the bill, so I made up my own.

DSC_0041-1024x659

Notes: The core of this cake is similar to a Madeira cake, but with a higher proportion of almonds than you would normally find, and no lemon or other citrus because I wanted the peaches and raspberries to shine through. It’s essentially a cake for summer fruits, fairly light and very moist, and content to be the background for whatever delicacies you fancy – apricots, nectarines, plums, blueberries, strawberries…

If you fancy making this, please don’t skip the almond extract in the topping, because it’s really important to the flavour of this cake. I buy it at the local Sainsburys, so it shouldn’t be hard to get hold of.

Ingredients:

for the cake

175g butter, softened, plus extra for greasing
175g sugar
3 large eggs
1 tsp vanilla extract
1 tsp salt
100g ground almonds
150g self-raising flour
2 large or 3 small/flat peaches, fairly ripe
100g raspberries – either fresh or frozen is fine

for the topping

50g butter
150g full fat cream cheese
50g icing sugar
1 tsp almond extract
handful of toasted almond flakes
handful of freeze dried raspberries (not essential, but pretty)

Method:

  1. Preheat your oven to 180C/ 160C fan/ gas 4. Find your largest loaf tin (mine is 30cm x 15cm), and grease and line it with parchment paper. Beat your butter and sugar together until light and fluffy, then gradually beat in your eggs, followed by the vanilla extract. Fold your almonds into the mixture, then sift your flour and salt together and fold that in too.
  2. Cut your peaches into fairly chunky slices, and pop them in another small bowl with your raspberries and around 1 tbsp of flour. Shake it all about a bit so the flour lightly coats the fruit (it will help to stop all the fruit sinking to the bottom of the cake). Fold the fruit into your cake mixture, then dollop the mixture into your prepared tin and smooth over the top. Pop it in the oven for 50-60 minutes, or until the cake is firm and golden and passes the skewer test. Let it cool for ten minutes, and then get it out the tin and let it cool completely.
  3. Make your topping. Beat the butter with an electric mixer until it’s soft, and then beat in the cream cheese. Sift the icing sugar into the mixture, fold it in roughly, and then beat it properly until the mixture is smooth. Add the almond extract and beat once more. When your cake is completely cool (absolutely and completely – I have learned this the hard way many times), spread the topping onto it, and sprinkle it the cake with your toasted almond flakes and freeze dried raspberries.
DSC_00101

Chocolate and Pistachio Buns

You know how Picasso had a Blue Period? Well, I’m having a Pistachio Period. Exactly the same kind of thing. Except my phase is less artistic. And less sad. And will hopefully last for less than three years, because pistachios are really expensive.

I tend to get obsessed with certain ingredients, and before I know it, they’re in everything. Poor James has had to put up with an absolutely unreasonable amount of pistachios in the past month. There was the pistachio, dark chocolate and apricot cake, which I will post the recipe for at some point because it’s one of my favourites. There were the pistachio and walnut brownies.  The pistachio and apricot frangipane tart. The pistachio and pomegranate cake. Pistachios stirred through innumerable salads. Pistachios eaten by the handful. And now these pistachio and chocolate buns. I’m also working on a pistachio-crusted chicken recipe.

Actually, now I’m listing it all, it’s even worse than I thought.

DSC_0003-1024x626

What can I say? They’re delicious. And so pretty! Purple flecked when whole and shelled, pale green when chopped and ground. And so versatile! A great addition to sweet and savoury recipes. And healthy! Full of Vitamin A. Although admittedly they may be less healthy when you mix them with huge amounts of sugar and chocolate.

I’ll shut up now.

I’ve always been like this about certain foods. I will become utterly obsessed with them, eat them daily and work out sneaky ways to include them in every meal and hope the people I am feeding don’t notice and become perturbed by my sudden obsession with pistachios, or pomegranate seeds, or salted caramel, or avocado… Then something else will catch my attention, and we’ll be off on a new tack. I’m the same way about music: I will listen to a song five hundred times until I know it more intimately than my own hands, and then move along to a new backing track for my life. I’ll binge-watch every single episode of a TV show and be interested in nothing else. I’ll watch a film, then rewind it and watch it again. I am intensely loyal in my obsessions… for a limited amount of time, until I’m obsessed with something else.

Just me?

Anyway, these were a bit of an experiment, and I was really happy with them in the end. When I mentioned that I was making them to a friend, who (normally) has excellent taste, he was doubtful:

‘am not sure about chocolate and pistachio?
pistachio seems too… salty?
savoury?’

Well, I’m happy to say he was wrong. And not just because I was right.

DSC_0002-2-1024x683

Notes: I prefer to let this dough develop in the fridge overnight, because I think the longer prove gives it a deeper flavour, and also I rarely have time for two proves in the morning. However, if it’s easier, you can just cover it and leave it in a warm place for an hour for the first prove.

These buns are best eaten on the day of making, as they do stale fairly quickly, as does all fresh pastry. However, if you keep them in an airtight container they should be alright – although not quite as good – the next day.

Ingredients:

for the dough

500g strong white flour, plus a bit extra for dusting
1 tsp salt
1 sachet of fast acting yeast (they are usually 7g and can be bought in any supermarket)
300ml whole milk
1 large egg
fairly flavourless oil, for greasing (vegetable, corn, rapeseed, whatever you have lying around)

for the filling

30g butter, melted
100g shelled pistachios
120g sugar (I used caster, but whatever you have should work as long as it’s not too dark)
120g butter (you will have an easier time if it’s a bit soft)
100g chocolate (I used 70%, but use milk if you prefer)

for the topping

2 tbsp apricot jam
100g sifted icing sugar

Method:

  1. Pop the milk and butter in a pan to warm through – you want the butter completely melted and the mixture to be ‘blood temperature’, which I always think sounds creepy, but basically it shouldn’t feel either particularly warm or particularly cool when you touch it. While it’s warming through, combine the flour and salt into your largest mixing bowl, then make a well in the middle and pop the yeast in. Lightly dust a large surface with flour in preparation.
  2. When the milk and butter mixture is ready, pour it into your dry mixture, add your egg, and stir it all together – I find a silicone spatula easiest at this point, but if you’re the type that likes getting your hands messy then live that dream. When it’s all come together, tip it out onto your prepared floury surface and knead it however you like until it becomes smooth and elastic – it should take about five minutes.
  3. When it’s kneaded, pop the dough into a lightly oiled bowl, cover it with cling film, and pop it in the fridge overnight (or cover it with a damp tea towel and leave it in a warm place for an hour if you prefer).
  4. Prepare your filling. Put your pistachios and sugar in your food processor and pulse them until you get a chunky sandy texture – the sugar should stop the pistachios turning into a paste at this stage. Then add your butter and blend until well combined – you should end up with a paste with clearly defined bits of pistachio in it. Chop your chocolate into small pieces.
  5. Tip your dough out onto a floured surface, and roll it into a 30cm x 20cm rectangle. I am useless at judging measurements by eye so tend to check this with an actual tape measure. Brush the melted butter all over the dough, and then take your pistachio paste and spread it all over your rectangle. Sprinkle your chopped chocolate on top.
  6. Roll up your dough. The long side of the rectangle should be facing you – roll it in tightly towards you from the opposite long side. When you’ve got it tightly rolled, cut it with a sharp knife (I find my bread knife works best) into thick rounds. You should get around 10 – 12. Place the buns, cut side up, into a deep pan or dish which has been greased with butter, leaving about a finger-width of space between each. I use my big rectangular brownie pan but a circular dish will work too.
  7. Cover, and leave to rise in a warm place for about half an hour. When this prove is done, the buns should be touching each other in the pan. Preheat your oven to 190C/ gas 5. When it’s nice and hot, pop the buns in. Bake until they are starting to turn golden – around fifteen minutes. I prefer my buns slightly under-done, as I like the doughy squishiness and think they stale less quickly this way. However, if you prefer them darker and crisper, bake them for an extra five to ten minutes.
  8. Pop the jam in the microwave with a splash of water and heat if for around thirty seconds until it’s smooth and spreadable. When your buns are ready, brush them with the jam. Mix your icing sugar with enough water to make a thick paste (start with one tablespoon and go from there) and drizzle it over the buns. I prefer to do all this in the tin and take them out a few minutes afterwards, once they have set, to minimise the amount of jam and icing all over my kitchen.
DSC_0033

Gooseberry and Hazelnut Bublanina

When I was young, and my dad was away working a lot of the time and my mum was in college getting her Fine Art degree, my brother and I were looked after by au pairs. There were four of them, and they each lived with us for a year, so we were covered from when I was six to when I was ten. I presume that once I was ten my parents decided I could look after myself (or maybe they were around more, I’m not sure – I find my childhood memories all tend to blend into each other quite indistinctly, and I have a hard time remembering exactly what happened when).

Anyway, the au pairs were Eszter, Petra, Daša, and Eva. After looking after us, Eszter eventually moved to England permanently and had two lovely kids, and I still see her occasionally. She’s Hungarian, but Petra, Daša, and Eva were from the Czech Republic.

I grew up hearing lots of odd snippets of different languages as, while my parents were both born in England, we lived in Russia for a while when I was young and a lot of my mother’s family were German. My parents had also lived in India before having my brother and I in Canada, and we had a lot of friends who came to stay with us from all over the world. Then there were the au pairs: part of the reason they came to England was often because they wanted to improve their language skills, but my mother particularly was always keen to learn snippets of Czech from them. To this day, my mother will often greet people with a loud ‘dobré ráno!’ and throw occasional Czech phrases into conversation. I have no idea how accurate they are, but it sounds fairly impressive.

DSC_0029-1024x645

We’d also end up eating the occasional bit of Czech cuisine. Again, I have no idea how authentic any of this was, as it was my mother’s interpretation of whatever she’d been told, but when I was little we ate a lot of bread dumplings, which I think we called knedlíky. My brother and I loved the chocolate and hazelnut Czech Kolonada wafers, and I remember there being a lot of Czech beer around.

So I have a fondness for what I know of the Czech Republic and the wonderful people I’ve met who hail from there, and happy memories of the few bits of Czech food I tried as a child. When I saw a recipe for blueberry bublanina, a Czech ‘bubble’ cake, in Anne Shooter’s Sesame and Spice, I wanted to give it a try. A lovely friend of our had a glut of gooseberries in her garden and kindly donated some to me for ‘research purposes’, and this recipe was born.

DSC_00051-1024x683

Source: Sesame and Spice, by the way, is fantastic – probably my favourite of all the cook books I have bought this year so far. Recipes that are delicious and unusual, yet achievable, are presented in a well laid out and accessible book full of beautiful pictures. I have adjusted Anne Shooter’s bublanina recipe a fair bit, adding hazelnuts and switching blueberries for gooseberries and playing with some of the quantities, but the basic principle is similar.

Notes: As with all cakes filled with berries, which give out a lot of liquid, it’s sometimes tricky to tell when this cake is cooked. I would advise you to err on the side of caution and leave it in the oven until you’re completely sure it’s done (and you won’t normally hear me say that) because it’s quite hard to dry out this cake, but very easy to leave an uncooked mess of berries and cake mix in the middle.

This is a wonderfully adaptable recipe, and will take well to any number of fruits and nuts you care to combine.

Ingredients:

115g butter
115g light brown soft sugar
3 eggs, separated
2 tbsp milk
4 tbsp hazelnut butter
150g plain flour
1 teaspoon salt
400g gooseberries, tossed in 1 tbsp plain flour
4 tbsp chopped toasted hazelnuts
icing sugar, for dusting (optional)

Method:

  1. Preheat oven to 190c/170c fan/ Gas 5. Grease a 23cm loose-bottomed or springform tin with butter, and line with base with greaseproof paper. Cream your butter and sugar together until light and fluffy – it will take three to five minutes. Mixing continually, add your egg yolks one by one, followed by the milk and hazelnut butter.
  2. Whisk your egg whites to stiff peaks in a separate bowl. Fold them gently into your wet mixture, then sift and fold in the flour and salt. Gently fold in the gooseberries, then carefully put your mixture into your cake tin (trying not to knock all the air out of it), and sprinkle it with the hazelnuts.
  3. Bake your cake for around 40-50 minutes, or until it is golden and risen and passes the skewer test. Let it cool for fifteen minutes before taking it out of the tin. Dust with icing sugar if desired.


DSC_0010

Gin Lemon Drizzle Birthday Cake

A couple of years ago, I lived with one of my closest friends, Ren. Ren is funny and smart, creative and kind, and I love her dearly, but Christ is she a pain in the arse to cook for. Not only is she a vegetarian, she’s a picky vegetarian, with allergies to random things like red food colouring and white chocolate, who irrationally dislikes things that are traditional cornerstones of vegetarian meals, like mushrooms and salad. On her birthday one year, I made the mistake of asking her what she wanted me to cook for her birthday dinner.

‘Anything you like!’ I said, hopefully. ‘Come on, let me treat you!’

‘I want an omelette’, she replied, definitively.

My face fell. ‘Omelette? Really? I could make you anything! Something special! What about a goats’ cheese and red onion tart? Homemade ravioli? A vegetarian pithivier?’

‘Omelette’, she repeated, stubbornly.

In the end, she consented to let me make it ‘special’ by putting blue cheese on top. I didn’t try to make her a special birthday meal again.

I was reminded of this recently when I asked my fiancé’s brother what kind of birthday cake he’d like me to bake for him, and he answered, without hesitation, ‘Lemon drizzle’.

I mean, don’t get me wrong, there’s nothing wrong with a good lemon drizzle cake. Sometimes it really hits the spot. But when I’m making a birthday cake for someone I care about, I like to make an occasion of it. You know the sort of thing. Multiple layers, probably ombre. New and exciting flavour combinations. Two types of frosting. Edible flowers. Chocolate all the way. Something that’s going to take hours and probably cause me a huge amount of stress and be impossible to transport when ready, because I never learn.

So, because I can’t let well enough alone, I decided to try to create a sort of ultimate special occasion lemon drizzle cake. A cake with the base values of a lemon drizzle very much included, but with a bit more pizzazz. A bit more excitement. A bit more… gin.

And this cake was born.

DSC_00172-1024x695

Source: I began with the sumptuous Nigella’s base recipe from How To Be A Domestic Goddess, but have adapted it liberally.

Notes: The gin measurements are merely suggestions. They give a definite taste of gin, but not an overwhelming raw punch of it. Obviously, feel free to add more if you want the sort of cake you can’t drive after eating.

Ingredients:

For the cakes
250g butter
300g caster sugar
4 large eggs
zest of 2 lemons
350g self raising flour
1 tsp salt
3 shots gin

For the syrup
juice of 3 lemons
200 g icing sugar
3 shots of gin

Optional: 4 more shots of gin

For the buttercream
100g butter
250g icing sugar
zest of 1 lemon

Optional: 1 jar of lemon curd

Method:

  1. Preheat your oven to 180C/ gas 4. Grease and line two 20cm cake tins.
  2. Cream together butter and sugar until pale and fluffy. Add the eggs one by one, beating well after each, and then lemon zest, beating again. Sift the flour and the salt together and then fold them into the mixture. Once combined, add the gin and mix again.
  3. Divide the batter between your tins as evenly as you can, and bake for around 45 minutes, or until the cakes are risen, golden, and firm.
  4. While the cakes are baking, make the syrup. Put the lemon juice and icing sugar into a small saucepan and heat gently until the sugar dissolves. Take the pan off the heat and let the mixture cool slightly, and then add the gin – you don’t want to cook off the alcohol.
  5. Immediately after you take the cakes out of the oven, puncture all over with a skewer or a fork, and pour the syrup over the cakes while they are still warm. It will seem like there is too much liquid, but the cakes will eventually drink it up. If you want an extra gin hit, pour two more shots of ‘raw’ gin over each cake after the syrup.
  6. Once the cakes have cooled completely, remove them from the tins. To make the buttercream, beat the butter with an electric whisk until it’s completely soft. Sift the icing sugar over the butter, then beat it in gently with a spatula before attacking it with the electric whisk – if you go straight for the whisk it will go everywhere. Add the lemon zest and blend again.
  7. Up-end one cake on a plate and spread lemon curd over the surface, if using. Spread the other cake with buttercream and sandwich them together. Cover the cakes completely with the remaining buttercream, if you like (you could also just do the top or leave them bare). Top with whatever you fancy. Raspberries? Lemon zest? Candied peel? Decorating birthday cakes is not exactly my strength, as you can see.

Share with friends, and hope none of them are teetotal. Or driving.


DSC_0005

Raspberry & Goats’ Cheese Brownies

I should have started writing a blog years ago. Literally, years ago. And the reason I didn’t is pretty stupid: I felt intimidated.

I’m a big reader of blogs, you see – I like nosing into other people’s lives and kitchens – so I am fully aware of the vast, huge, mountainous variety of things to read out there. It seems like every second person has a blog nowaways, and you can find one on almost any conceivable subject. There are thousands upon thousands of UK food blogs. I felt that if I started one of my own, I would just be shouting into the void. I always told myself that my cooking would never be as good as the others, my photographs never as polished, my writing never as engaging. I don’t think of myself as a creative person at all. And nobody would ever read it, so what would be the point?

I would look at all the of wonderful, talented, established food bloggers that I admire, and know that I could never get to that stage. It seemed to me that I should have started back in 2006, when food blogs were becoming ‘a thing’ for the first time. ‘I’m such an idiot!’ I would tell myself, ‘I could have done hundreds of posts by now! I could have archives! I could feel like I know what I am doing!’

I really never feel like I know what I am doing.

DSC_00171-1024x720

Eventually, I managed to convince myself that everyone has to start somewhere, and that it’s likely that all those people I admire probably used to feel like they were shouting into the void too. James always tells me that the idea is not to focus on what everyone else is doing, but to focus on doing your own thing as well as you can and recognising that you might have something the person next to you doesn’t. Of course, he’s much wiser than I am, and got his act together re: creative output many years ago.

That all sort of clumsily brings me on to these brownies.

DSC_0028-1024x683

Source: The recipe is from Faith Durand, and can be found on The Kitchn website, here. Faith Durand is one of those intimidatingly amazing people who I really admire (this is her career! She makes a living out of this! Have you seen that website?!), and I love her recipes. Of course, she’s American, so naturally I’ve had to convert the recipe because ounces and cups mean nothing to me. I’ve tweaked it very mildly in the process, but this is still hers.

Notes: These brownies actually taste better if you let them sit and eat them the next day. If you can manage that, though, you’re a better person than I. They also do very well frozen, and can be eaten cold.

Goats’ cheese and chocolate might sound weird, but I promise you, it’s perfection. If you are serving them to people who might raise eyebrows, just call them ‘raspberry cheesecake brownies’ and tell them what’s in them afterwards. Or don’t.

Ingredients:

125g raspberries, lightly crushed with a fork
2 tbsp kirsch, or crème de cassis, or whatver vaguely alcoholic red liqueur you have lying about
285g dark chocolate (70% or higher)
170g unsalted butter
125ml whole milk
400g caster sugar
1 tsp vanilla extract
4 large eggs
130g plain flour
¼ tsp baking powder
½ tsp salt

for the topping

225g goat’s cheese
110g full-fat cream cheese
30g unsalted butter
1 egg
50g sugar
1 tsp almond extract
Freeze dried raspberries, to decorate (optional)

Method:

  1. First, place your chocolate and butter in a bowl over a pan of simmering water to melt. I always put this on first because it usually unexpectedly takes ages.
  2. Heat the oven to 180C/ 160c fan/gas mark 4. Grease and line a brownie pan – I use a rectangular 30cm x 20cm one for everything. Lining the pan will make it far easier to get the brownies out later. Mix your liqueur with your raspberries and set it aside in a bowl to marinate.
  3. Your chocolate and butter should now be well on the way to melting. When it has, remove it from the heat and stir in the milk, and then let it cool for about five minutes. Then mix your sugar and vanilla into the chocolate mixture, and add your eggs one by one. Sift in the flour, baking powder, and salt, and fold until smooth. Chuck around half of the raspberries into the brownie mixture, stir, and spread it evenly into your pan.
  4. Now make the topping. I do this in a bowl with an electric hand whisk. Beat the goats’ cheese, cream cheese, butter, egg, sugar, and almond extract together until combined. Fold in the reserved raspberries – you don’t want them fully incorporated because you want the swirly ripple effect. Use a regular spoon to dollop the cheesecake mixture onto the top of the brownie mixture, then use a skewer or a knife to swirl it around until it looks marbled.
  5. Bake it for twenty minutes, then check it. You’re looking for the brownies to be just barely set in the middle, but starting to very lightly brown and crack around the outsides. It might take up the half an hour, depending on your oven and the size of your pan. As soon as you take them out of thee oven, sprinkle the freeze dried raspberry pieces over the top, if using. Leave to cool and set.


DSC_0016

Pistachio and Pomegranate Cake

It’s not until you don’t have a job that you realise how often people ask you about your job.

When I was at the supermarket buying the pomegranates and pistachios I needed to make this cake (amongst other essentials such as Greek yoghurt, bacon, and gin, since I am not quite decadent or alliterative enough to buy only pomegranates and pistachios and call it a weekly shop) the kind lady at the till asked me, smiling, ‘So, day off work today then?’

‘Yes’, I smiled back, lying.

When I was at the having an eye exam, the sweet young girl checking my prescription asked, conversationally, ‘What do you do then?’

‘I’m an administrator’, I lied, and politely asked her how long she’d been at that optician’s practice.

When I got into a ridiculous accident and ended up in hospital, the friendly A&E consultant (after placating me with stupendous amounts of prescription painkillers) enquired ‘Will you be alright at work?’

‘Oh yes, definitely, I’ll be fine!’ I reassured him brightly.

Yeah, of course I’d be fine, as I had no work to go to.

I haven’t been unemployed before. I went straight from school to university and into work. And, let me be clear, I am not in any way deserving of pity. I had a job, and I wasn’t fired, or made redundant. I quit. I quit because the job was making me absolutely and completely unsustainably miserable. It makes me feel a bit pathetic really, because I don’t think I had much right to be upset about it. I would cry before I left for work and I would cry when I came home, and sometimes I’d lock myself in the stationery cupboard in the office and cry there. But it’s not like I was sweeping chimneys, or crawling through sewer pipes, or cleaning deep fat fryers, so what right did I have to be so unhappy? Then again, I always think that’s a bit of a pointless way to think: would you think you didn’t have the right to be happy if other people had reasons to be happier than you? But still, it bothered me.

Anyway. Everyone around me – friends and family – saw me struggling and told me it wasn’t worth it, and that I should just leave. I knew I would be returning to studying full-time come September, and so I thought I would spend the last two months of summer left to me before that living off my savings, doing odd bits of freelance work, writing, organising, helping friends, and cooking lots.

The sense of relief I felt when I walked out of that job was enormous. But it’s been challenging, in its own way, too. It’s difficult to feel purposeless, and to have a lack of structure. It’s scary not to have any consistent money coming in. It’s a complicated situation to explain to people. It makes me feel lazy and entitled. I thrive when incredibly busy, and now it seems like I have deep vast rivers of time to float in, drifting gently on my back downstream in the glow of the hazy July sunshine.

DSC_00102-1024x885

I am completely aware that these challenges are nothing compared to those faced by people who genuinely cannot get a job, who are stuck in unemployment and wish desperately not to be, people for whom the subject money is a constant, gnawing knot of panic that sits in a hard lump beneath every thought. I am in the incredibly privileged position of having something else diverting to go to come September and enough money to live on until then. I chose the situation I am in now, while I am painfully aware that others do not have that choice.

And that, I suppose, is why I end up lying to people who ask me about my work. People don’t expect me to be unemployed, and in telling them that I am I would be giving them an incorrect impression: they might believe that I am struggling, and that I am hopelessly trying to find work, rather than taking a voluntary break and putting myself firmly into this camp. My situation is complicated to explain, and it’s easier to just pretend I am still at my old job in passing situations, rather than to bog people down in unnecessary detail that they don’t care about: ‘Well… actually, I’m not working at the moment.I quit my job. Because I’m going back to study, see. In September. So I’m a student! But not really. So I’m unemployed, really. I mean, not exactly, I do a bit of freelance work. But by choice! So it’s okay! Sort of…’

If I’m being completely honest, I worry that all of these people with legitimate jobs will look down on me when they hear I’m unemployed, perhaps even more so when they hear I chose to be this way.

So, on that cheerful note, onto the cake!

DSC_0031-1024x819

Source: Edd Kimber’s blog – the original recipe can be found hereI have tweaked it, but the glorious pomegranate and pistachio combination is his. Well, I thought of it, and then Googled it and realised someone else had gotten there first. This happens to me a lot.

Notes: This actually makes a pretty huge cake, but it keeps well and retains moisture for a couple of days. My taste-testers included the gorgeous young sons of a friend of mine. One of them apparently doesn’t like cake (I know, right?), and yet liked this. I am assured there can be no higher praise.

Ingredients:

225g butter at room temperature
200g light brown soft sugar
zest of three lemons
4 large eggs, lightly beaten
70g plain flour
1 tsp baking powder
1 tsp salt
200g shelled pistachios, plus spare to decorate
1 pomegranate, seeded

Method:

  1. Preheat your oven to 180C/ 160C fan/ gas 4, and grease a 23cm cake tin, preferably springform. Line the base of the tin.
  2. Put your pistachios and 1 tbsp of flour in a food processor and pulse until finely ground and sandy, but make sure to stop before they become a paste.
  3. Cream your butter and sugar together in a large bowl until light and fluffy, then add your lemon zest. Gradually beat in the eggs. Sieve your flour, baking powder and salt until well combined, and then stir your ground pistachios into this dry mixture. Fold the flour mixture into the wet batter gently, until just combined.
  4. Place in your tin and bake for around 45 minutes, or until the cake is golden, firm to touch, and passes the skewer test. Once the cake is out of the oven, let it cool, and then remove it from the tin. Cover with your pomegranate seeds and the remaining pistachios.
DSC_03461

Spiced Cauliflower Muffins

I don’t have a cookbook problem, I have a cookbook solution (the solution, funnily enough, is always ‘buy more cookbooks’).

I had to forcibly restrain myself from buying cookbooks for a long time, because I lived in rented accommodation and moved every year, and the last thing I needed was boxes upon boxes of heavy, large, hardback books to take with me in addition to all the other things I was lugging around. So, when we got a flat and settled a bit, the first thing I did was to buy all the cookbooks on my wishlist. The second thing I did was look at my bank balance and weep.

A good cookbook is a thing of beauty. E-readers have their place in the world, and my Kindle is certainly handy when it saves me from taking a bag filled only with books on holiday or lets me carry five hundred novels in my handbag, but cookbooks really don’t translate to e-readers. From what I can see, proper hardback cookbooks are still going strong, despite the e-book boom. Deliciously Ella, published in January this year, was the fastest selling début cookbook since records began. Looking at the Top 100 best-selling books on Amazon at the moment, I can see Mary Berry’s Absolute Favourites is number nine on the list as I’m writing this. The aforementioned Deliciously Ella is still number 15, despite having been out for seven months, and The Art of Eating Well and Cook Yourself Young are numbers 19 and 20. Not a particularly scientific proof of a claim, I know, but it’s a rough indication.

So why are cookbooks still beloved, and going from strength to strength? I adore my shelves of cookbooks because they’re beautiful. They’re jewel-bright and thick with potential delights, with the pleasant heft of a proper tome. You open them up to find gorgeous, inspiring photos. You run your hands over the glossy pictures of a tray of pillow-soft Madeleines; a steaming lamb tagine adorned with plump apricots; a golden loaf of sourdough bread with a crackling crust. You are inspired to want to create something and bring a piece of the book to life. Cookbooks are aspirational, and they encourage you to actually go and make something with your hands.

When I get a cookbook, I read through it like a novel, marking the recipes that I desperately want to make immediately.

In Itamar Srulovich and Sarit Packer’s Honey & Co.: The Baking Book I marked about 25 recipes.

DSC_0363-683x1024

It’s a really wonderful book. Not only is it full of interesting and accessible recipes that I’m desperate to make, it also has warmth and character. The care and attention that Itamar and Sarit have given to the recipes really shines through. I love the little pieces of history that adorn the pages.

As it happens, the first thing I made from the book was a batch of spiced cauliflower muffins. They might not naturally have been my first choice, but I had a cauliflower about to turn in the fridge, and when I opened the book at random and fell upon this recipe it seemed like food fate (I know that’s not a thing).

DSC_0361-1024x683

Source: As mentioned above, a book of beauty and joy.

Notes: This recipe makes six muffins, which was perfect for our small household, but do double it if you’re feeding a crowd. I think they’d be excellent for a brunch – it’s nice to have something a bit different. I’d love to try a version with broccoli, feta, and wholemeal flour – I think the recipe could be adapted fairly widely. Anyway, I made it pretty much exactly as it was in the book and I didn’t think it needed changing.

Ingredients:

1 small head of cauliflower
1 tsp salt

for the muffins

175g plain flour
30g caster sugar
1/2 tsp baking powder
2 tsp cumin
1 tsp ground coriander
1/2 tsp tumeric
1/2 tsp salt
1/2 tsp ground pepper
4 eggs
150g melted butter

for the topping (marked ‘if you like’ in the book, but I think essential)

3 tbsp mixed seeds
3 tbsp grated Parmesan

Method:

  1. Break the cauliflower into large florets, making sure there are at least six large, distinct, pretty pieces to add to your muffin cases. Bring a large pan of water to the boil with your salt, and then pop your cauliflower in and cook it for 5-10 minutes. You don’t want it to be completely soft, but a knife should be able to penetrate the stem of each floret. Drain it, and set aside to cool.
  2. Heat your oven to 190C/ 170C fan/ gas 5. Get a muffin tray, and line six holes with cases. Combine all the dry ingredients in a large bowl then add your eggs one by one and beat well. Fold in your melted butter.
  3. Dollop a spoonful of batter into each muffin case and then try to place a big floret of cauliflower up in each. Don’t worry too much if they fall over or slightly to the side. Cover your florets with batter and fill the cases almost to the top. Combine your seeds and cheese, and sprinkle the top of each muffin with the mixture. Bake the muffins for 15 minutes, until golden, slightly risen, and set.
DSC_0040

Basic Brownies

Let’s start with some life advice from someone supremely unqualified to give it, shall we?

I really would recommend leaving university, if you are that way inclined, with at least a vague idea of what you would like to do with your life once you have clambered off the carousel of read-write-sleep-repeat. Instead of doing this, I cooked a lot. When I worried that I had no idea what my future career would be, well-meaning friends, family members, and supposed authority figures, would tell me that it would all come together in the end. ‘You’ll figure it out by the time you graduate!’, they said, blithely optimistic.

It didn’t work out exactly like that.

DSC_00291-1024x570

I did all the things you’re supposed to do. I won an internship for the summer between my second and third years. I wrote a CV. I went to all of the careers fairs the university offered. I saw a careers advisor. But I just… didn’t want to do any of the jobs that were real options. All of the jobs that I actually wanted to do (doctor, chocolatier, pilot, vet, recipe tester) were so wildly inaccessible to me, me with my English degree and my complete lack of experience, that I may as well have just said ‘I want to be a princess astronaut and have my own spaceship castle’, and left it at that.

Lots of people told me to do something I loved; not to worry about money or career progression at that stage, but to focus on doing something I enjoyed and trust that the rest would come later. Well, that’s all very well, but I needed money for WiFi and heating and croissants, and couldn’t afford to do unpaid internships. I was already deep in debt from degree number one, and I couldn’t bear the thought of further specialised study to actually get me onto a career path that might appeal, costing thousands of pounds and leaving me not earning for another year or two. So I left university feeling pretty directionless.

What I did have, instead of a five year plan and earning potential, was a fail-safe brownie recipe. It might not keep me warm at night (unless I eat enough brownies to cultivate an insulating layer of blubber) but it has other uses. I spent a summer testing various recipes, trying to find one that matched my brownie-ideals, and finally hit upon what I’m about to share with you below. I’ve memorised it and adapted it, and I genuinely can’t remember where the base recipe came from originally, so if you recognise it then please do let me know.

People are often down on brownies, thinking them dull and easy, but I think they are the solution to all of your dessert problems. They are incredibly quick and simple to make. They can be served hot and gooey, undercooked and fresh from the oven, with a scoop of ice cream. They can be served straight from the freezer in the summer, adorned with berries or sorbet. They are loved by children and adults alike. They keep, chilled, for ages. They are robust, and don’t mind a couple of hours in a hot car or a bumpy ride on the back of a bike.

Most of all, brownies are adaptable. Once you have a solid base recipe you are happy with, the possibilities are, if not literally endless, certainly numerous. Want to make them gluten free? Swap the flour for ground almonds. Want to make them vegan? Swap the eggs for apple sauce and the butter for oil. Want to feed people with allergies? Skip the nuts. Best of all, brownies are a vehicle. You can basically chuck anything you think would be good in there and call yourself a culinary genius.

DSC_0043-1024x683

Notes: This recipe makes dense, chocolatey, rich, fudgy (rather than cakey) brownies, as this is my preference. I always think you should be able to dent a brownie with your thumb.

Ingredients:

275g dark chocolate (I use Lindt 70%)
225g butter
190g plain flour
1 tsp baking powder
a pinch of salt
4 large eggs, beaten
1 tsp vanilla essence
200g caster sugar
100g granulated sugar (I find the granulated helps give the brownies a crackling top, but skip it and use all caster if that’s what you have)
200g of ‘extras’ – go wild. Chopped dark, white, or milk chocolate? Chunks of Mars, Crunchie, Bounty? Pecans, walnuts, peanuts? Peanut butter? Raspberries, strawberries, cherries, orange? Caramel, fudge, toffee? Bacon?

Method:

  1. Preheat your oven to 180C/160C fan/gas mark 4. Grease and line a rectangular baking pan (mine is 20cm x 30cm, but whatever you have will probably be fine).
  2. Melt the chocolate and butter together in a glass bowl set over a pan of simmering water. While the chocolate and butter are melting, sift the flour, baking power, and salt together in a mixing bowl. Chop and prepare any additions you want for your brownies.
  3. Dump the sugar(s), vanilla essence, and beaten eggs into the joyous bowl of chocolate loveliness once it’s all melted, stirring well after each addition. The longer and harder you beat the mixture after you add the eggs, the more crispy top you will get. Then add the chocolate mix to the dry mix and stir it all together. Chuck in any additions you may be using and stir again. Pour it into your lined pan.
  4. Bake. This takes 20 minutes in my rather fierce fan oven, but could be more or less in yours, so use your judgement. You want them just starting to crack on top, round the edges, but not quite set in the middle.
  5. Leave the brownies to set in the tin, if you want to serve them solid. You can cover them and pop them in the fridge or freezer when they’re cool enough. You can also cut and serve them immediately, hot and gooey, as a dessert. Or, er, just eat them straight from the pan. Not that I have ever done that.

Enjoy, and reflect proudly on the fact that you know exactly what you’re doing with your life.

DSC_0346

Vaguely Healthy Breakfast Muffins

I often find breakfast tricky. It has a lot of limitations that other meals don’t.

I mean, sure, on a weekend it can be glorious. Pancakes studded with bursting blueberries, omelettes fat with cheese and ham, croissants shining with jam and butter, a steaming plate of bacon and eggs, home-made granola adorning berries and Greek yoghurt… what was I saying?

On weekdays, though, there’s time pressure – assuming you have to be getting out of the door and to some sort of job at some stage. You’re probably feeling a bit bleary and not up to cooking, or indeed eating, anything too elaborate. The idea of making your own batter for something is laughable.

I, personally, am a bit of a precious cow about eating the same thing every day. While my wonderfully unfussy partner would happily have an eat-by-numbers series of identical breakfasts forever, I tend to get bored. So, I set about finding recipes to make up this ‘Vaguely Healthy Breakfast’ series. ‘Vaguely Healthy’ only got in there because if I’m eating something pretty often, even I admit that the thing shouldn’t be peanut butter, Nutella, and raspberry jam on toast (don’t pretend that doesn’t sound delicious).

So I’ve started looking for things that are easy, have at least some nutritional value, and that can either be pre-prepped or made quickly. Enter: muffins.

DSC_0352-1024x683

Vaguely Healthy Breakfast Muffins

Source: Recipe (minimally) adapted from the ever-wonderful BBC Good Food.

Notes: I thought these were good when I made them as per recipe, but lacking in a little flavour. I have swapped the honey for maple syrup, added a pinch of salt and some more spices, and mixed in raspberries with the blueberries for some added sharpness and a more complex taste. I also use Greek yoghurt instead of natural, as I like the tang. Since they use wholemeal flour, Greek yoghurt, seeds, fresh berries, oil instead of butter, and maple syrup instead of sugar, they qualify as ‘vaguely healthy’ in my head. If this supposition is incorrect, please don’t tell me, because I don’t want to know.

Ingredients

2 large eggs
150g Greek yogurt
50ml rapeseed oil (or any reasonably unflavoured oil you have lying about)
100g pureed apples (I used baby food because it’s all rock and roll over here)
1 ripe banana, mashed
4 tbsp maple syrup
1 tsp vanilla extract
200g wholemeal flour
50g rolled oats
1½ tsp baking powder
1½ tsp bicarbonate of soda
1½ tsp cinnamon
1 tsp nutmeg
100g mixed blueberries and raspberries (or whatever you think would work really – blackberries, apricots, grated apple…)
2 tbsp mixed seeds

Method

  1. Heat oven to 180C/160C fan/gas 4. Line a 12-hole muffin tin with 12 large muffin cases.
  2. Whisk up the eggs, yogurt, oil, apple puree, banana, maple syrup and vanilla in a large bowl, until it’s all well-combined. Chuck everything else, except the seeds, into another bowl, and mix that together too.
  3. Pour the wet ingredients into the dry slowly and mix until smooth. Don’t overmix (I kind of hate this instruction in recipes as OBVIOUSLY I wouldn’t overmix something on purpose, but basically mix it until it’s just combined and you can’t see any flour patches and then stop). Divide the batter between the cases – I find an ice cream scoop best for this.
  4. Sprinkle the muffins with the seeds. Bake. Mine only took 15 minutes at 160C in my fairly fierce fan oven, but you will know what is best in yours. You want them to be golden and well risen. Remove from the oven and leave to cool.
  5. Can be eaten as is. They’re also nice sliced, toasted, and spread with butter. The really great thing is that you can freeze them, so make a batch and that’s twelve breakfasts sorted right there.