DSC_0035

Malt Chocolate Banana Bundt Cake

Do you know what the difference between an introvert and an extrovert is? That sounds like it’s going to be the set up to a joke, but it’s not: I’m actually asking.

I thought I knew, until recently. I had a vague notion that introverts preferred their own company, and were often solitary and shy, while extroverts were confident and social by nature.

It turns out that definition isn’t accurate. Basically, as I understand it, introverts draw their energy from being alone, while extroverts draw their energy from being around people. An introvert, therefore, isn’t necessarily a solitary person sitting in a corner: they could be juggling fire and cracking jokes in the centre of the group while asking you to update them on that saga with your neighbour’s dog and simultaneously getting the drinks in. But not forever. An introvert isn’t likely to be in the last group of determined pub-crawlers, unwilling to stop talking and so trekking around town to find somewhere still open at 3am. An extrovert, on the other hand, thrives on the company of others: they enjoy social time and are likely to be bored by themselves.


DSC_00311-1024x683

I am a classic introvert. Even if I am enjoying an evening with a group of people I genuinely like being around, I can only stick it out for a limited amount of time before becoming socially exhausted. It will sound ridiculous, but was only relatively recently that I realised that this was okay. It took me a worryingly long time to see that it’s actually fine to be the first one to say ‘Right, that’s me! See ya!’, stand up from the table, go through the business of the hugs and farewells, and escape.

I think that our social practices tend to cater to extroverts. There’s a certain kudos to being the one out latest, to being the ‘life and soul’. When you get up to leave early, people sigh and groan and say ‘Oh come on! It’s only 10pm! Stay for one more drink’. But now I know that it’s fine not to. I have a reputation for being the first to leave, the one tucked up in bed while everyone else is contemplating round five and wondering if anywhere serves food at 11pm. I don’t mind being thought of as a bit pathetic: for me, there’s no fun to be had in staying out when all my social energy has been drained, and I know I’m not good company by that stage either.

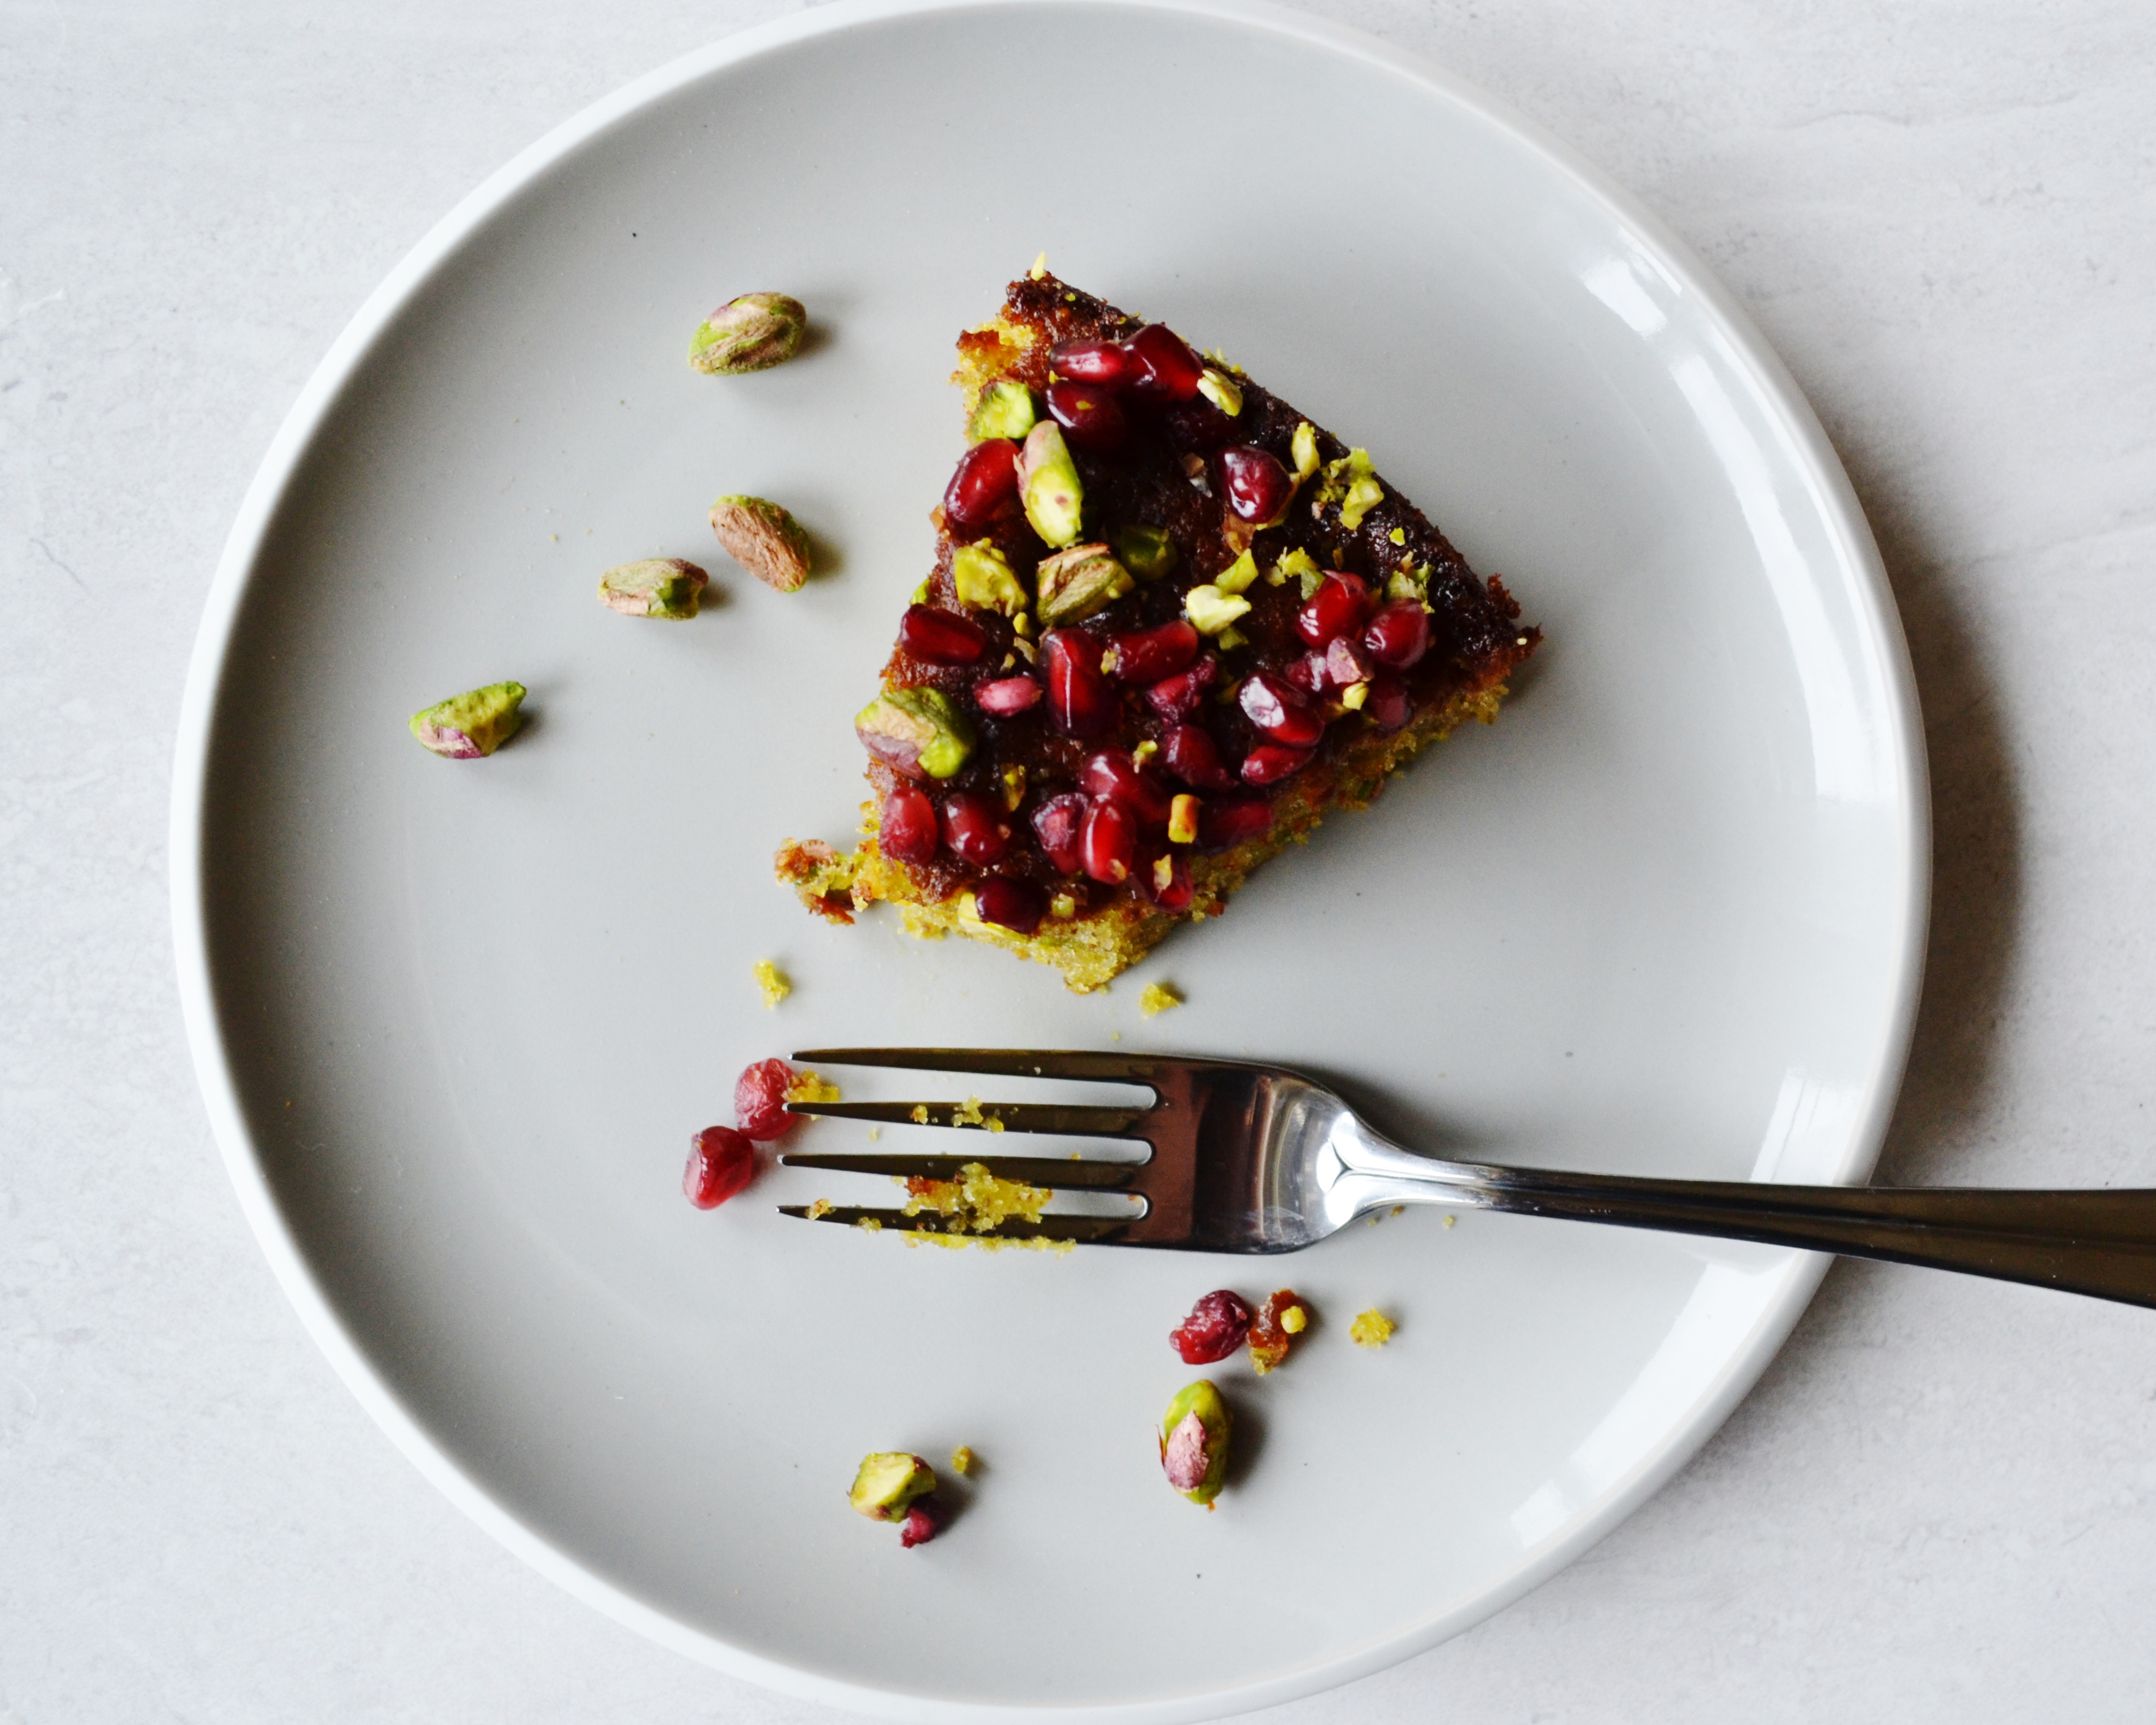
In keeping with the practice of doing what makes you happy rather than what is expected (as long as what makes you happy isn’t, you know, hurtful to others or illegal), I made this cake.

I picked up this beautiful book, by Annie Rigg, pretty much by accident. I had twenty minutes to kill in town and wandered into the bookshop, and then mooched along to the cookery section, and then casually picked up a book and… I really wasn’t intending to buy anything, but I couldn’t leave it behind.

The book is full of gorgeous, elaborate, modern recipes, and I could have made something much more impressive if I’d had the time and inclination. But this was the cake that was calling me, so even though it wasn’t the healthiest, or the fanciest, or trickiest, I decided to do it anyway.

DSC_0107-1024x683

Source: Summer Berries & Autumn Fruits, by Annie Rigg. It’s great.

Notes: I originally made this cake exactly as it was in the book, only changing the toppings because I wanted something pretty to feed to a group. Although the cake was delicious, I didn’t get the malt chocolate flavour through as strongly as I would have liked, so I have slightly upped the quantities here. Nonetheless, besides some slight alterations and extra toppings, this is very much Annie Rigg’s recipe.

Don’t be put off by the long list of ingredients: you will probably have most of them in the cupboard. In fact, the part of the reason that I chose this cake was that I was short on time and didn’t want to have to go shopping for supplies.

Ingredients:

for the cake

200g softened butter, plus extra for greasing
25g cocoa powder, plus extra for dusting
260g plain flour
40g malted milk powder (such as Ovaltine)
2 tsp baking powder
1/2 tsp bicarbonate of soda
pinch of salt
125g soft light brown sugar
100g caster sugar
4 large eggs, beaten
4 medium bananas, very ripe
3 tbsp sour cream, room temperature
1 tsp vanilla extract
50g dark chocolate, chopped

for the frosting

100g soft light brown sugar
100g dark muscovado sugar
75g butter
125ml double cream
50g dark chocolate, chopped
pinch of salt

extra toppings (optional)

bag of maltesers
1 firm banana
25g white chocolate

Method:

  1. Preheat your oven to 180C/ 160C fan/ gas 4. Grease a bundt tin with butter and dust with cocoa powder. The recipe suggests a 2.5 litre bundt tin, but I have no idea how big my tins are in litres (!?), and I only have one bundt tin anyway, so I went with that and it was fine. In a large bowl, sieve together the cocoa, flour, malted milk powder, baking powder, bicarbonate of soda, and salt.
  2. In another bowl, cream together your butter and both sugars. Add the beaten egg gradually, mixing until it’s even. Tip your dry ingredients into the bowl with the butter, sugars, and eggs. In the bowl that you were using for the dry mix (no need to wash it), mash the bananas, and then add the sour cream and vanilla and mix to combine. Tip this into the bowl with everything else and mix it all together. Add your chopped chocolate and fold it in.
  3. Pop your mixture into your tin, and bake for 30-40 minutes. Let the cake rest in the tin for two minutes (and no more), and then carefully turn it onto a wire rack and leave to cool completely.
  4. For the frosting, heat both sugars, butter, and cream gently in a saucepan until the butter is melted and the sugar dissolved. Simmer for 30 seconds, then remove from the heat and add the chocolate and salt. Stir until smooth, and then pour it gently over your cold cake.
  5. If you want to get overly complicated, like I did, top the cake with dried banana slices, maltesers, and grated white chocolate.

Enjoy a piece on your sofa, alone at 10pm on a Saturday night, reading a good book, watching your favourite TV show, or simply being content in your own company.

(Then probably take the rest of the cake out to share with friends, because it’s huge).

DSC_0077

Chocolate Fudge Cake

I went to a small school. By the time I got to Sixth Form, our year group comprised twenty seven people. Everyone else had left, mostly to go to schools that offered either a) a greater variety of A Level subjects or b) boys.

I loved school. Of course, there were some awful times – being a socially awkward, overweight, shy, bespectacled, book-obsessed teenager isn’t exactly the stuff of fantasies – and I certainly had what we can euphemistically refer to as ‘rocky moments’ throughout my time there. But basically, overall, it was great. I was at the same school for thirteen years (the secondary school had a primary school attached), it was a five minute walk away from my parents’ house (which was excellent, as I am lazy), and I felt like I knew my place in my safe little world.

Of course, I then went off to university and became a tiny minnow in a roiling, cavernous sea and it was awful, but that’s for another blog post.

DSC_0040-1024x716

My school doesn’t exist any more, of course. I mean, the building is still there, and it still has the same name. But the school I went to is gone. I’ve been away so long that all of the students I knew, even from the youngest years, will have passed through. All of the teachers who taught me at A Level have left, either retiring or going on to new places. Even the building has changed: since we left, they’ve rebuilt the boxy little old Sixth Form centre and made something shiny and new and unfamiliar. I wouldn’t know my way around there now. If I wanted to visit, I’d have to make an appointment, and sign in at the office, and get an access badge from an unfamiliar face on the reception desk. It was like a little bereavement, realising I couldn’t ever go back to the place where I spent the best part of thirteen years.

In our final year of school, as each of the twenty seven of us turned eighteen, we celebrated birthdays together. Everyone in the year would often club together to buy a special joint birthday present for whoever was hitting adulthood (legally, anyway), and we’d go out drinking, proudly flashing our legitimate IDs. We’d all share birthday cake in the Sixth Form common room, bringing pieces to class and giving them to teachers in the hope that they’d forgive us for being especially rowdy.

Sometimes, I made the birthday cakes for my friends, and when I did, I always made this one. After a while, people started calling it ‘Hannah Cake’.

My family isn’t particularly traditional, but we do have one ‘family recipe’: this chocolate fudge cake. I am tempted to lie and say it was passed down from my German great-grandmother, my Oma, to her son, and then to my mother, who passed it on to me. However, the truth is that my mother found it in a recipe book who knows how long ago, and baked it sporadically throughout my childhood. It was one of the first things I ever learned to bake myself.

DSC_0051-1024x683

Source: Now, this definitely originally came from a recipe book, but I’m afraid I can’t cite the source as it was twenty-odd years ago and I never knew it myself. I fear it will have been lost in time, but if someone does recognise it (anyone with a specialist knowledge of 1980s Canadian cookbooks?) then do please let me know. I am going to write it down from memory, so it will be slightly altered in any case.

Notes: The cake itself is more like a torte than anything else, I suppose, lightened as it is by egg whites, with a dense and delicious base of ground almonds. It lacks the apricot glaze of a sachertorte, though, and the icing itself is not a ganache but a delicious hybrid of a thing that I have never come across in any other recipe. It’s also denser, moister, and more cake-like than a classic torte, because of the breadcrumbs. I suspect the inclusion of breadcrumbs will be frowned upon by purists, but it makes it a very stable cake and therefore practically foolproof. I am going to tempt the wrath of the baking gods by telling you that I have been making this cake since the age of about eleven, and it has never gone wrong. It’s dense and chocolatey and moist and lovely, and best served in small-ish slices for those who are say things like ‘ooh, that’s very rich’. I can eat great slabs of it.

You will also need one cake tin, preferably springform. I’ve used everything from an 18cm tin to a 23cm tin here and been fine – you just need to keep an eye on it if you’re using a bigger tin because it will cook more quickly.

Ingredients:

For the cake

225g good quality dark chocolate (I use 70%)
225g butter, softened
225g caster sugar
6 large eggs, separated
1 tsp vanilla essence
110g ground almonds
150g fresh white bread (this will become breadcrumbs).

For the icing

175g icing sugar
50g cocoa powder
110g caster sugar
75g butter
4 tbsp tepid water

Method:

  1. Grease and line your tin (yes, you do really have to do this. Yes, even if it’s non-stick). Preheat your oven to 180C/160C fan/ gas 4.
  2. First, make your breadcrumbs. Whack all your bread into your food processor and blend it until it you’ve got some lovely white crumbs. If you don’t have a food processor then good luck to you: I have previously made breadcrumbs in a tiny little food processor-less student kitchen, and we tried grating bread, shredding it with forks, and eventually tearing it by hand. Not a fun half hour.
  3. Next, got your chocolate in a glass bowl over a simmering plan of water to melt. Keep a vague eye on it and stir it occasionally while you get on with the other stuff.
  4. Cream your butter and sugar together until light and fluffy. If you have done your mise-en-place properly you will have already separated your eggs. If you are like me and forget every bloody time, do that now. Then add your egg yolks to your butter and sugar one by one, beating them in as you go. Add the vanilla essence, then your almonds, melted chocolate and breadcrumbs.
  5. Whisk your egg whites into soft peaks. Take about a quarter of them and whack them in with the chocolate and beat it any old how, just to loosen up the mixture. Then fold the rest in slowly and carefully so you don’t knock all the air out.
  6. Dollop the mixture fairly carefully into your beautifully lined tin (again, you’re protecting the precious air that you worked so hard to get into the egg whites). Use a spatula to smooth it out as best you can.
  7. Pop it in the oven. Now, my oven is fairly vicious and I use a 23cm cake tin, so it takes about 35 minutes to cook for me. If you have a gentler oven or a smaller tin then it can take up to an hour. After half an hour, keep an eye on it. You want it springy to touch and just starting to crack along the top. Take it out, let it rest for ten minutes, then get it out the tin and turn it upside down so it’s flat-side up, ready to ice.
  8. Once you’ve got the cake out, start making the icing. You want to ice the cake while it’s still warm so that it runs off nicely. Put the butter, sugar, and water in a pan on medium heat and heat until there are no sugar crystals left – it should be smooth, not gritty. Keep an eye on it, though, so it doesn’t turn into caramel. Sieve the icing sugar and cocoa together. Pour the liquid mix into the powder mix gradually and whisk until you have smooth, glorious, fudgy icing. Tip it onto your cake, and push it down the sides. Decorate however you wish, although it’s perfectly delicious as is.
DSC_00171

Frosted Walnut Layer Cake – Bake Off Bake Along Week 1

I think one of the best things about the internet is that it connects people who might otherwise feel like they are alone. If you have always wanted to re-enact the Battle of Hastings dressed as a Death Eater while reciting the closing speech from The Breakfast Club, then you can find the only other person in the world who wants to do that too, and make it happen. When I was a child, the internet made me realise how big the world is, and yet made it feel so much smaller at the same time.

Over the last week, the internet has reminded me that I am not the only person who is worryingly excited by the return of the Great British Bake Off to our screens. And yes, I do mean ‘worryingly’ excited. I spent the afternoon and evening last Wednesday in such heightened anticipation that I think I scared James a bit.

How can I explain the joy of the Bake Off to those who don’t watch it? For me, it’s a guaranteed hour of pure happiness and escape from everything else that’s making me stressed. The Bake Off of is an overwhelmingly positive programme. You can see that Mary and Paul, and Mel and Sue, really want the contestants to do well. It’s light-hearted, and funny, and charming. It’s about people doing the thing they love as well as they can. It’s about creating things that are delicious, beautiful, and inventive. It’s about baking, for god’s sake.

DSC_0045-1024x683

Anyway, the show started last week, and it made me just as happy as it always does. I am going to go on the record now, by the way, and say that my bet on the final three is Marie, Tamal, and Flora. Just putting it out there.

I will be doing the #bakeoffbakealong for as long as I can manage this year, before my schedule absolutely cripples me. The choice this week was between a Madeira cake for the signature challenge, a walnut cake for the technical, or a Black Forest gateaux for the show-stopper. For me, I want the bake along to be an excuse to try recipes I wouldn’t normally bake. I made a variation on a Madeira cake mere days ago, and I need absolutely no encouragement to make a Black Forest gateaux. So, down walnut way we went.

DSC_0065-1024x683

Source: This recipe is widely available now that it’s been used on the Bake Off – see here – but I actually used the version in my copy of Mary Berry’s Baking Bible.

Notes: The recipe in the book is actually a bit different from the recipe that the contestants used in the show. Firstly, it doesn’t call for buttercream, simply advising you to use the frosting to sandwich the layers together as well as to coat the cake. Secondly, it doesn’t call for the walnuts to be caramelised. I was planning to do that anyway, but, as you can see, I didn’t in the end. I was making this cake to take to a party and we had to rush out the door: I simply ran out of time. Hard experience has taught me that you shouldn’t try and rush caramel, so I left it rather than risking burning myself dramatically.

Even though the recipe I was working from didn’t call for buttercream, and the bakers on the show used a plain vanilla buttercream, I went for an espresso buttercream. Just because, really. I felt like I wanted something to break up all the sweetness of the cake a bit. While I am happy with this decision taste-wise, it does mean the layers of the cake looked less distinctive, because the buttercream was a very similar colour to the sponge.

I am going to called this a marshmallow frosting, rather than a boiled frosting. This is partly because is tastes like marshmallow and partly because ‘boiled frosting’ sounds horrid.

Ingredients:

for the cakes

225g butter, softened, plus extra for greasing
225g caster sugar
4 large eggs
225g self-raising flour
2 tsp baking powder
100g walnuts, finely chopped, plus extra for decorating

for the buttercream

100g butter, softened
200g icing sugar
2 teaspoons of espresso powder dissolved in 1 tbsp boiling water

for the frosting

2 large egg whites
350g caster sugar
4 tbsp water
¼ tsp cream of tartar

Method:

  1. Preheat your oven to 160C/ 140c fan/ gas 3 and grease and line three 20cm sandwich tins with baking paper. I don’t have three 20cm tins (or any three matching tins, for that matter), so I had to do the baking in two stages.
  2. Whack all your cake ingredients in a large bowl and beat them together with an electric whisk. The book specifies this all-in-one method, which is what I used, and it worked fine. That’s why you have two teaspoons of baking powder – you need extra rise because you’re not getting as much air into it through multiple beating stages. Divide your batter into three equal amounts and bake your cakes for 25-30 minutes.
  3. Once the cakes are completely cool, make your buttercream, Beat your butter and icing sugar together until smooth and fluffy, then beat in your espresso. Spread half of it over your bottom sponge, and top with your second sponge. Spread the second half onto the top of your second sponge, and top with the third.
  4. For the frosting, measure all of the frosting ingredients into a glass bowl set over a pan of simmering water and beat for 10-15 minutes with an electric whisk. This bit is really boring, but you do have to do it to make sure the frosting isn’t grainy with sugar. Check it about ten minutes in by rubbing a bit between your thumb and forefinger and seeing if you can feel sugar grains. It should be smooth.
  5. Cover the top and sides of your cake with the icing. You can either swirl it or leave it smooth(ish), depending on your preference. Decorate your cake with walnuts (or do it properly and caramelise some, if you are better at time management than me).


DSC_0033

Gooseberry and Hazelnut Bublanina

When I was young, and my dad was away working a lot of the time and my mum was in college getting her Fine Art degree, my brother and I were looked after by au pairs. There were four of them, and they each lived with us for a year, so we were covered from when I was six to when I was ten. I presume that once I was ten my parents decided I could look after myself (or maybe they were around more, I’m not sure – I find my childhood memories all tend to blend into each other quite indistinctly, and I have a hard time remembering exactly what happened when).

Anyway, the au pairs were Eszter, Petra, Daša, and Eva. After looking after us, Eszter eventually moved to England permanently and had two lovely kids, and I still see her occasionally. She’s Hungarian, but Petra, Daša, and Eva were from the Czech Republic.

I grew up hearing lots of odd snippets of different languages as, while my parents were both born in England, we lived in Russia for a while when I was young and a lot of my mother’s family were German. My parents had also lived in India before having my brother and I in Canada, and we had a lot of friends who came to stay with us from all over the world. Then there were the au pairs: part of the reason they came to England was often because they wanted to improve their language skills, but my mother particularly was always keen to learn snippets of Czech from them. To this day, my mother will often greet people with a loud ‘dobré ráno!’ and throw occasional Czech phrases into conversation. I have no idea how accurate they are, but it sounds fairly impressive.

DSC_0029-1024x645

We’d also end up eating the occasional bit of Czech cuisine. Again, I have no idea how authentic any of this was, as it was my mother’s interpretation of whatever she’d been told, but when I was little we ate a lot of bread dumplings, which I think we called knedlíky. My brother and I loved the chocolate and hazelnut Czech Kolonada wafers, and I remember there being a lot of Czech beer around.

So I have a fondness for what I know of the Czech Republic and the wonderful people I’ve met who hail from there, and happy memories of the few bits of Czech food I tried as a child. When I saw a recipe for blueberry bublanina, a Czech ‘bubble’ cake, in Anne Shooter’s Sesame and Spice, I wanted to give it a try. A lovely friend of our had a glut of gooseberries in her garden and kindly donated some to me for ‘research purposes’, and this recipe was born.

DSC_00051-1024x683

Source: Sesame and Spice, by the way, is fantastic – probably my favourite of all the cook books I have bought this year so far. Recipes that are delicious and unusual, yet achievable, are presented in a well laid out and accessible book full of beautiful pictures. I have adjusted Anne Shooter’s bublanina recipe a fair bit, adding hazelnuts and switching blueberries for gooseberries and playing with some of the quantities, but the basic principle is similar.

Notes: As with all cakes filled with berries, which give out a lot of liquid, it’s sometimes tricky to tell when this cake is cooked. I would advise you to err on the side of caution and leave it in the oven until you’re completely sure it’s done (and you won’t normally hear me say that) because it’s quite hard to dry out this cake, but very easy to leave an uncooked mess of berries and cake mix in the middle.

This is a wonderfully adaptable recipe, and will take well to any number of fruits and nuts you care to combine.

Ingredients:

115g butter
115g light brown soft sugar
3 eggs, separated
2 tbsp milk
4 tbsp hazelnut butter
150g plain flour
1 teaspoon salt
400g gooseberries, tossed in 1 tbsp plain flour
4 tbsp chopped toasted hazelnuts
icing sugar, for dusting (optional)

Method:

  1. Preheat oven to 190c/170c fan/ Gas 5. Grease a 23cm loose-bottomed or springform tin with butter, and line with base with greaseproof paper. Cream your butter and sugar together until light and fluffy – it will take three to five minutes. Mixing continually, add your egg yolks one by one, followed by the milk and hazelnut butter.
  2. Whisk your egg whites to stiff peaks in a separate bowl. Fold them gently into your wet mixture, then sift and fold in the flour and salt. Gently fold in the gooseberries, then carefully put your mixture into your cake tin (trying not to knock all the air out of it), and sprinkle it with the hazelnuts.
  3. Bake your cake for around 40-50 minutes, or until it is golden and risen and passes the skewer test. Let it cool for fifteen minutes before taking it out of the tin. Dust with icing sugar if desired.


DSC_0010

Gin Lemon Drizzle Birthday Cake

A couple of years ago, I lived with one of my closest friends, Ren. Ren is funny and smart, creative and kind, and I love her dearly, but Christ is she a pain in the arse to cook for. Not only is she a vegetarian, she’s a picky vegetarian, with allergies to random things like red food colouring and white chocolate, who irrationally dislikes things that are traditional cornerstones of vegetarian meals, like mushrooms and salad. On her birthday one year, I made the mistake of asking her what she wanted me to cook for her birthday dinner.

‘Anything you like!’ I said, hopefully. ‘Come on, let me treat you!’

‘I want an omelette’, she replied, definitively.

My face fell. ‘Omelette? Really? I could make you anything! Something special! What about a goats’ cheese and red onion tart? Homemade ravioli? A vegetarian pithivier?’

‘Omelette’, she repeated, stubbornly.

In the end, she consented to let me make it ‘special’ by putting blue cheese on top. I didn’t try to make her a special birthday meal again.

I was reminded of this recently when I asked my fiancé’s brother what kind of birthday cake he’d like me to bake for him, and he answered, without hesitation, ‘Lemon drizzle’.

I mean, don’t get me wrong, there’s nothing wrong with a good lemon drizzle cake. Sometimes it really hits the spot. But when I’m making a birthday cake for someone I care about, I like to make an occasion of it. You know the sort of thing. Multiple layers, probably ombre. New and exciting flavour combinations. Two types of frosting. Edible flowers. Chocolate all the way. Something that’s going to take hours and probably cause me a huge amount of stress and be impossible to transport when ready, because I never learn.

So, because I can’t let well enough alone, I decided to try to create a sort of ultimate special occasion lemon drizzle cake. A cake with the base values of a lemon drizzle very much included, but with a bit more pizzazz. A bit more excitement. A bit more… gin.

And this cake was born.

DSC_00172-1024x695

Source: I began with the sumptuous Nigella’s base recipe from How To Be A Domestic Goddess, but have adapted it liberally.

Notes: The gin measurements are merely suggestions. They give a definite taste of gin, but not an overwhelming raw punch of it. Obviously, feel free to add more if you want the sort of cake you can’t drive after eating.

Ingredients:

For the cakes
250g butter
300g caster sugar
4 large eggs
zest of 2 lemons
350g self raising flour
1 tsp salt
3 shots gin

For the syrup
juice of 3 lemons
200 g icing sugar
3 shots of gin

Optional: 4 more shots of gin

For the buttercream
100g butter
250g icing sugar
zest of 1 lemon

Optional: 1 jar of lemon curd

Method:

  1. Preheat your oven to 180C/ gas 4. Grease and line two 20cm cake tins.
  2. Cream together butter and sugar until pale and fluffy. Add the eggs one by one, beating well after each, and then lemon zest, beating again. Sift the flour and the salt together and then fold them into the mixture. Once combined, add the gin and mix again.
  3. Divide the batter between your tins as evenly as you can, and bake for around 45 minutes, or until the cakes are risen, golden, and firm.
  4. While the cakes are baking, make the syrup. Put the lemon juice and icing sugar into a small saucepan and heat gently until the sugar dissolves. Take the pan off the heat and let the mixture cool slightly, and then add the gin – you don’t want to cook off the alcohol.
  5. Immediately after you take the cakes out of the oven, puncture all over with a skewer or a fork, and pour the syrup over the cakes while they are still warm. It will seem like there is too much liquid, but the cakes will eventually drink it up. If you want an extra gin hit, pour two more shots of ‘raw’ gin over each cake after the syrup.
  6. Once the cakes have cooled completely, remove them from the tins. To make the buttercream, beat the butter with an electric whisk until it’s completely soft. Sift the icing sugar over the butter, then beat it in gently with a spatula before attacking it with the electric whisk – if you go straight for the whisk it will go everywhere. Add the lemon zest and blend again.
  7. Up-end one cake on a plate and spread lemon curd over the surface, if using. Spread the other cake with buttercream and sandwich them together. Cover the cakes completely with the remaining buttercream, if you like (you could also just do the top or leave them bare). Top with whatever you fancy. Raspberries? Lemon zest? Candied peel? Decorating birthday cakes is not exactly my strength, as you can see.

Share with friends, and hope none of them are teetotal. Or driving.


DSC_0016

Pistachio and Pomegranate Cake

It’s not until you don’t have a job that you realise how often people ask you about your job.

When I was at the supermarket buying the pomegranates and pistachios I needed to make this cake (amongst other essentials such as Greek yoghurt, bacon, and gin, since I am not quite decadent or alliterative enough to buy only pomegranates and pistachios and call it a weekly shop) the kind lady at the till asked me, smiling, ‘So, day off work today then?’

‘Yes’, I smiled back, lying.

When I was at the having an eye exam, the sweet young girl checking my prescription asked, conversationally, ‘What do you do then?’

‘I’m an administrator’, I lied, and politely asked her how long she’d been at that optician’s practice.

When I got into a ridiculous accident and ended up in hospital, the friendly A&E consultant (after placating me with stupendous amounts of prescription painkillers) enquired ‘Will you be alright at work?’

‘Oh yes, definitely, I’ll be fine!’ I reassured him brightly.

Yeah, of course I’d be fine, as I had no work to go to.

I haven’t been unemployed before. I went straight from school to university and into work. And, let me be clear, I am not in any way deserving of pity. I had a job, and I wasn’t fired, or made redundant. I quit. I quit because the job was making me absolutely and completely unsustainably miserable. It makes me feel a bit pathetic really, because I don’t think I had much right to be upset about it. I would cry before I left for work and I would cry when I came home, and sometimes I’d lock myself in the stationery cupboard in the office and cry there. But it’s not like I was sweeping chimneys, or crawling through sewer pipes, or cleaning deep fat fryers, so what right did I have to be so unhappy? Then again, I always think that’s a bit of a pointless way to think: would you think you didn’t have the right to be happy if other people had reasons to be happier than you? But still, it bothered me.

Anyway. Everyone around me – friends and family – saw me struggling and told me it wasn’t worth it, and that I should just leave. I knew I would be returning to studying full-time come September, and so I thought I would spend the last two months of summer left to me before that living off my savings, doing odd bits of freelance work, writing, organising, helping friends, and cooking lots.

The sense of relief I felt when I walked out of that job was enormous. But it’s been challenging, in its own way, too. It’s difficult to feel purposeless, and to have a lack of structure. It’s scary not to have any consistent money coming in. It’s a complicated situation to explain to people. It makes me feel lazy and entitled. I thrive when incredibly busy, and now it seems like I have deep vast rivers of time to float in, drifting gently on my back downstream in the glow of the hazy July sunshine.

DSC_00102-1024x885

I am completely aware that these challenges are nothing compared to those faced by people who genuinely cannot get a job, who are stuck in unemployment and wish desperately not to be, people for whom the subject money is a constant, gnawing knot of panic that sits in a hard lump beneath every thought. I am in the incredibly privileged position of having something else diverting to go to come September and enough money to live on until then. I chose the situation I am in now, while I am painfully aware that others do not have that choice.

And that, I suppose, is why I end up lying to people who ask me about my work. People don’t expect me to be unemployed, and in telling them that I am I would be giving them an incorrect impression: they might believe that I am struggling, and that I am hopelessly trying to find work, rather than taking a voluntary break and putting myself firmly into this camp. My situation is complicated to explain, and it’s easier to just pretend I am still at my old job in passing situations, rather than to bog people down in unnecessary detail that they don’t care about: ‘Well… actually, I’m not working at the moment.I quit my job. Because I’m going back to study, see. In September. So I’m a student! But not really. So I’m unemployed, really. I mean, not exactly, I do a bit of freelance work. But by choice! So it’s okay! Sort of…’

If I’m being completely honest, I worry that all of these people with legitimate jobs will look down on me when they hear I’m unemployed, perhaps even more so when they hear I chose to be this way.

So, on that cheerful note, onto the cake!

DSC_0031-1024x819

Source: Edd Kimber’s blog – the original recipe can be found hereI have tweaked it, but the glorious pomegranate and pistachio combination is his. Well, I thought of it, and then Googled it and realised someone else had gotten there first. This happens to me a lot.

Notes: This actually makes a pretty huge cake, but it keeps well and retains moisture for a couple of days. My taste-testers included the gorgeous young sons of a friend of mine. One of them apparently doesn’t like cake (I know, right?), and yet liked this. I am assured there can be no higher praise.

Ingredients:

225g butter at room temperature
200g light brown soft sugar
zest of three lemons
4 large eggs, lightly beaten
70g plain flour
1 tsp baking powder
1 tsp salt
200g shelled pistachios, plus spare to decorate
1 pomegranate, seeded

Method:

  1. Preheat your oven to 180C/ 160C fan/ gas 4, and grease a 23cm cake tin, preferably springform. Line the base of the tin.
  2. Put your pistachios and 1 tbsp of flour in a food processor and pulse until finely ground and sandy, but make sure to stop before they become a paste.
  3. Cream your butter and sugar together in a large bowl until light and fluffy, then add your lemon zest. Gradually beat in the eggs. Sieve your flour, baking powder and salt until well combined, and then stir your ground pistachios into this dry mixture. Fold the flour mixture into the wet batter gently, until just combined.
  4. Place in your tin and bake for around 45 minutes, or until the cake is golden, firm to touch, and passes the skewer test. Once the cake is out of the oven, let it cool, and then remove it from the tin. Cover with your pomegranate seeds and the remaining pistachios.